
Guide · DTF · UPrint Design RIP and Studio DTF RIP
Your full profit and loss DTF software, step by step
Type what your ink, film and powder cost you, once. Then every gang sheet shows what it cost, what it sold for and what it made. Four parts, about ten minutes.
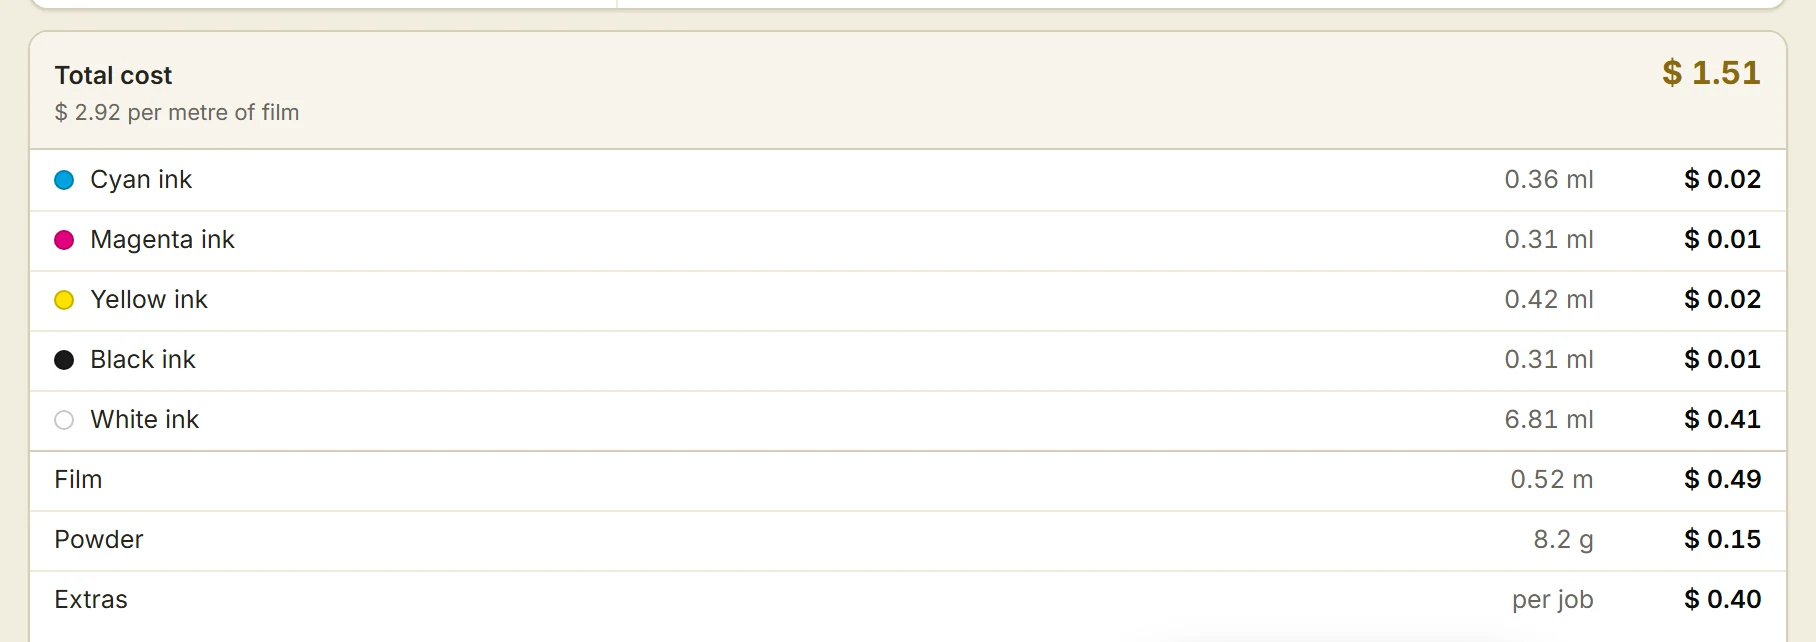
Part 1: Your costs, once
Until you type your costs, a job says add a price. The app never makes up a number. You do this part once, and change it when your prices change.
1Open Cost settings and pick DTF roll
- Press the tag button at the top of the Queue Manager.
- Under Which machine, pick DTF roll.
The boxes for ink, film and powder open.
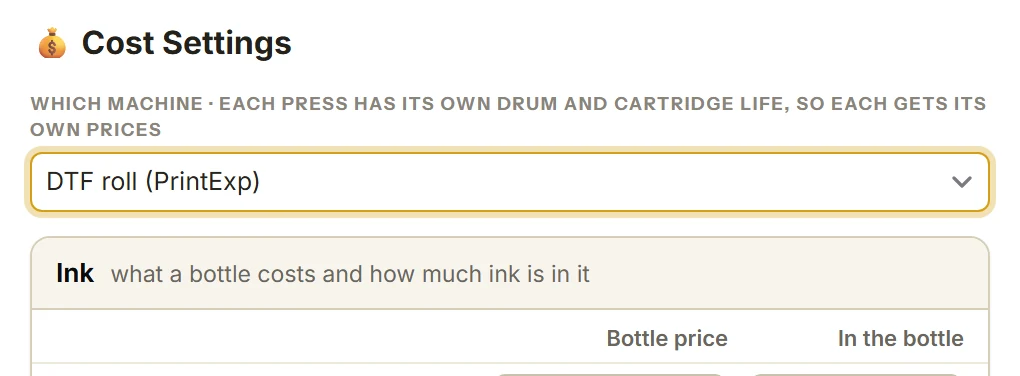
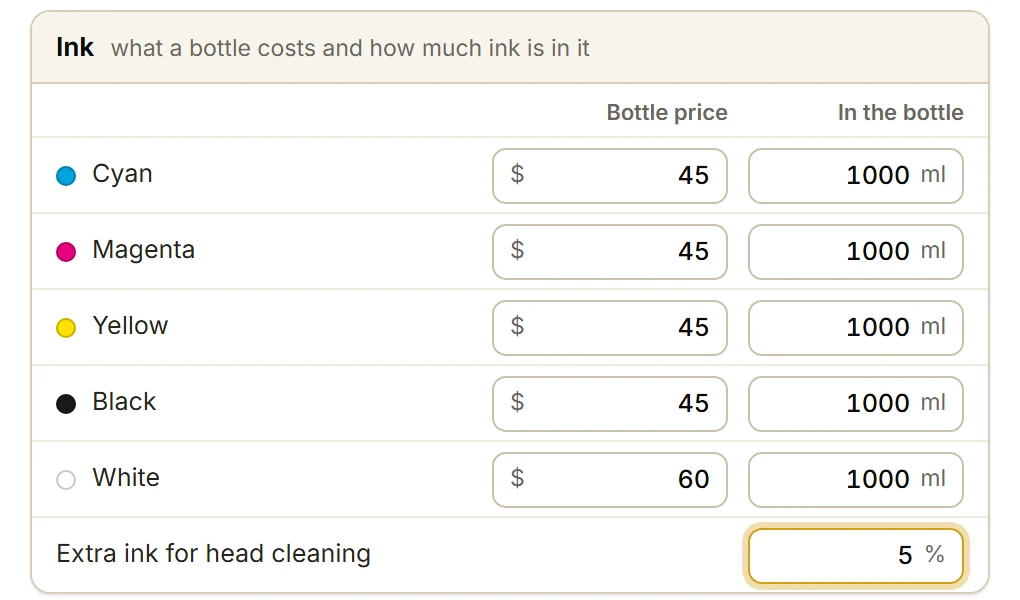
2Your ink: what a bottle costs, and how much is in it
- For cyan, magenta, yellow, black and white, type the bottle price.
- Type the ml in the bottle.
- Type a little extra for head cleaning, as a %.
The app already knows the ink drops your print head fires. You only type what you pay.
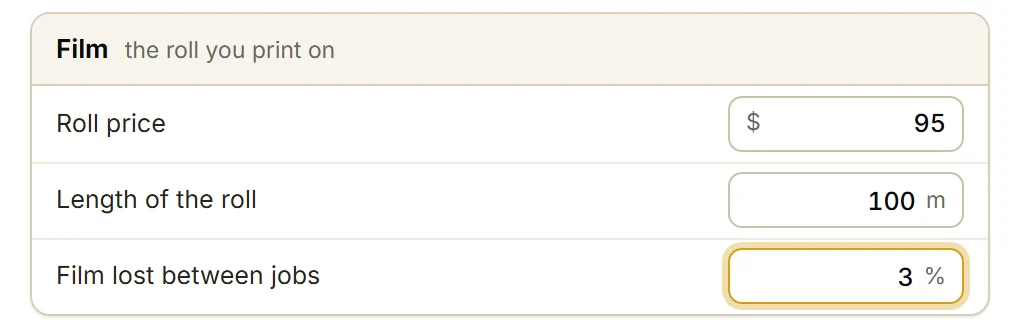
3Your film: the roll, and what you lose
- Type what a roll costs.
- Type how long it is, in metres.
- Type how much you lose between jobs, as a %.
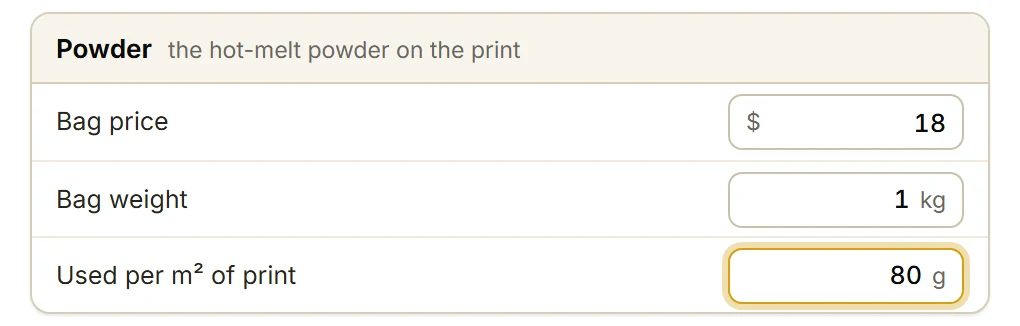
4Your powder: the bag, and how much goes on
- Type what a bag costs, and what it weighs.
- Type how many grams go on a square metre of print.
Not sure of the grams? Weigh a bag before and after a known length of print, then type it in.
5Add any extra cost per job
- Press + Add cost under Extras per job.
- Type a name, like "Bag and label", and what it costs.

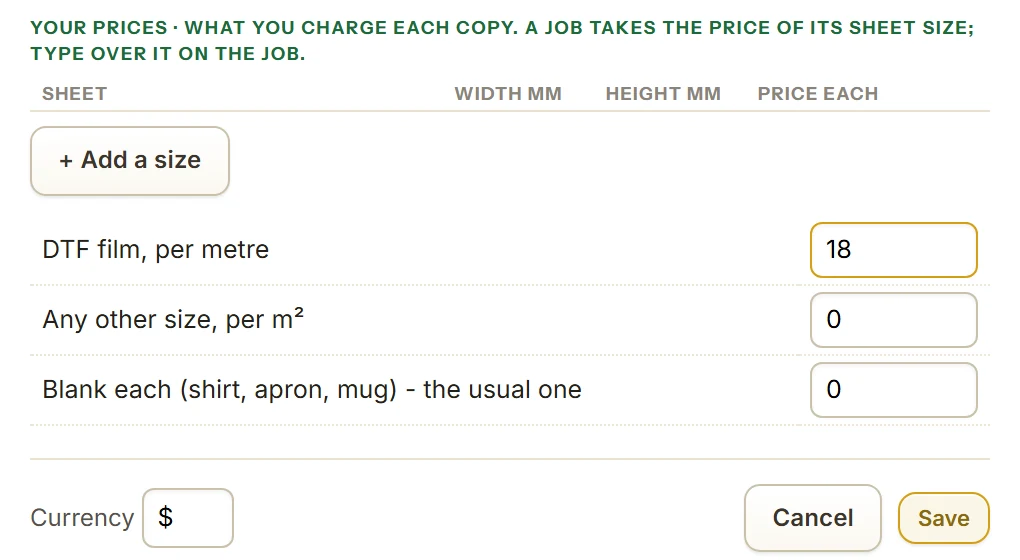
6Pick your currency, and your price per metre
- At the bottom of Cost settings, type your money sign in the Currency box. Here, $.
- Under Your prices, type what you charge for one metre of film.
- Press Save
Every price in the app now shows in your money, and every DTF job shows its profit.
Type the sign you work in: $, R, or any other. Every price shows it.
Part 2: Every job, counted
7Build the gang sheet on a page one metre long
- Open your design on the Design canvas.
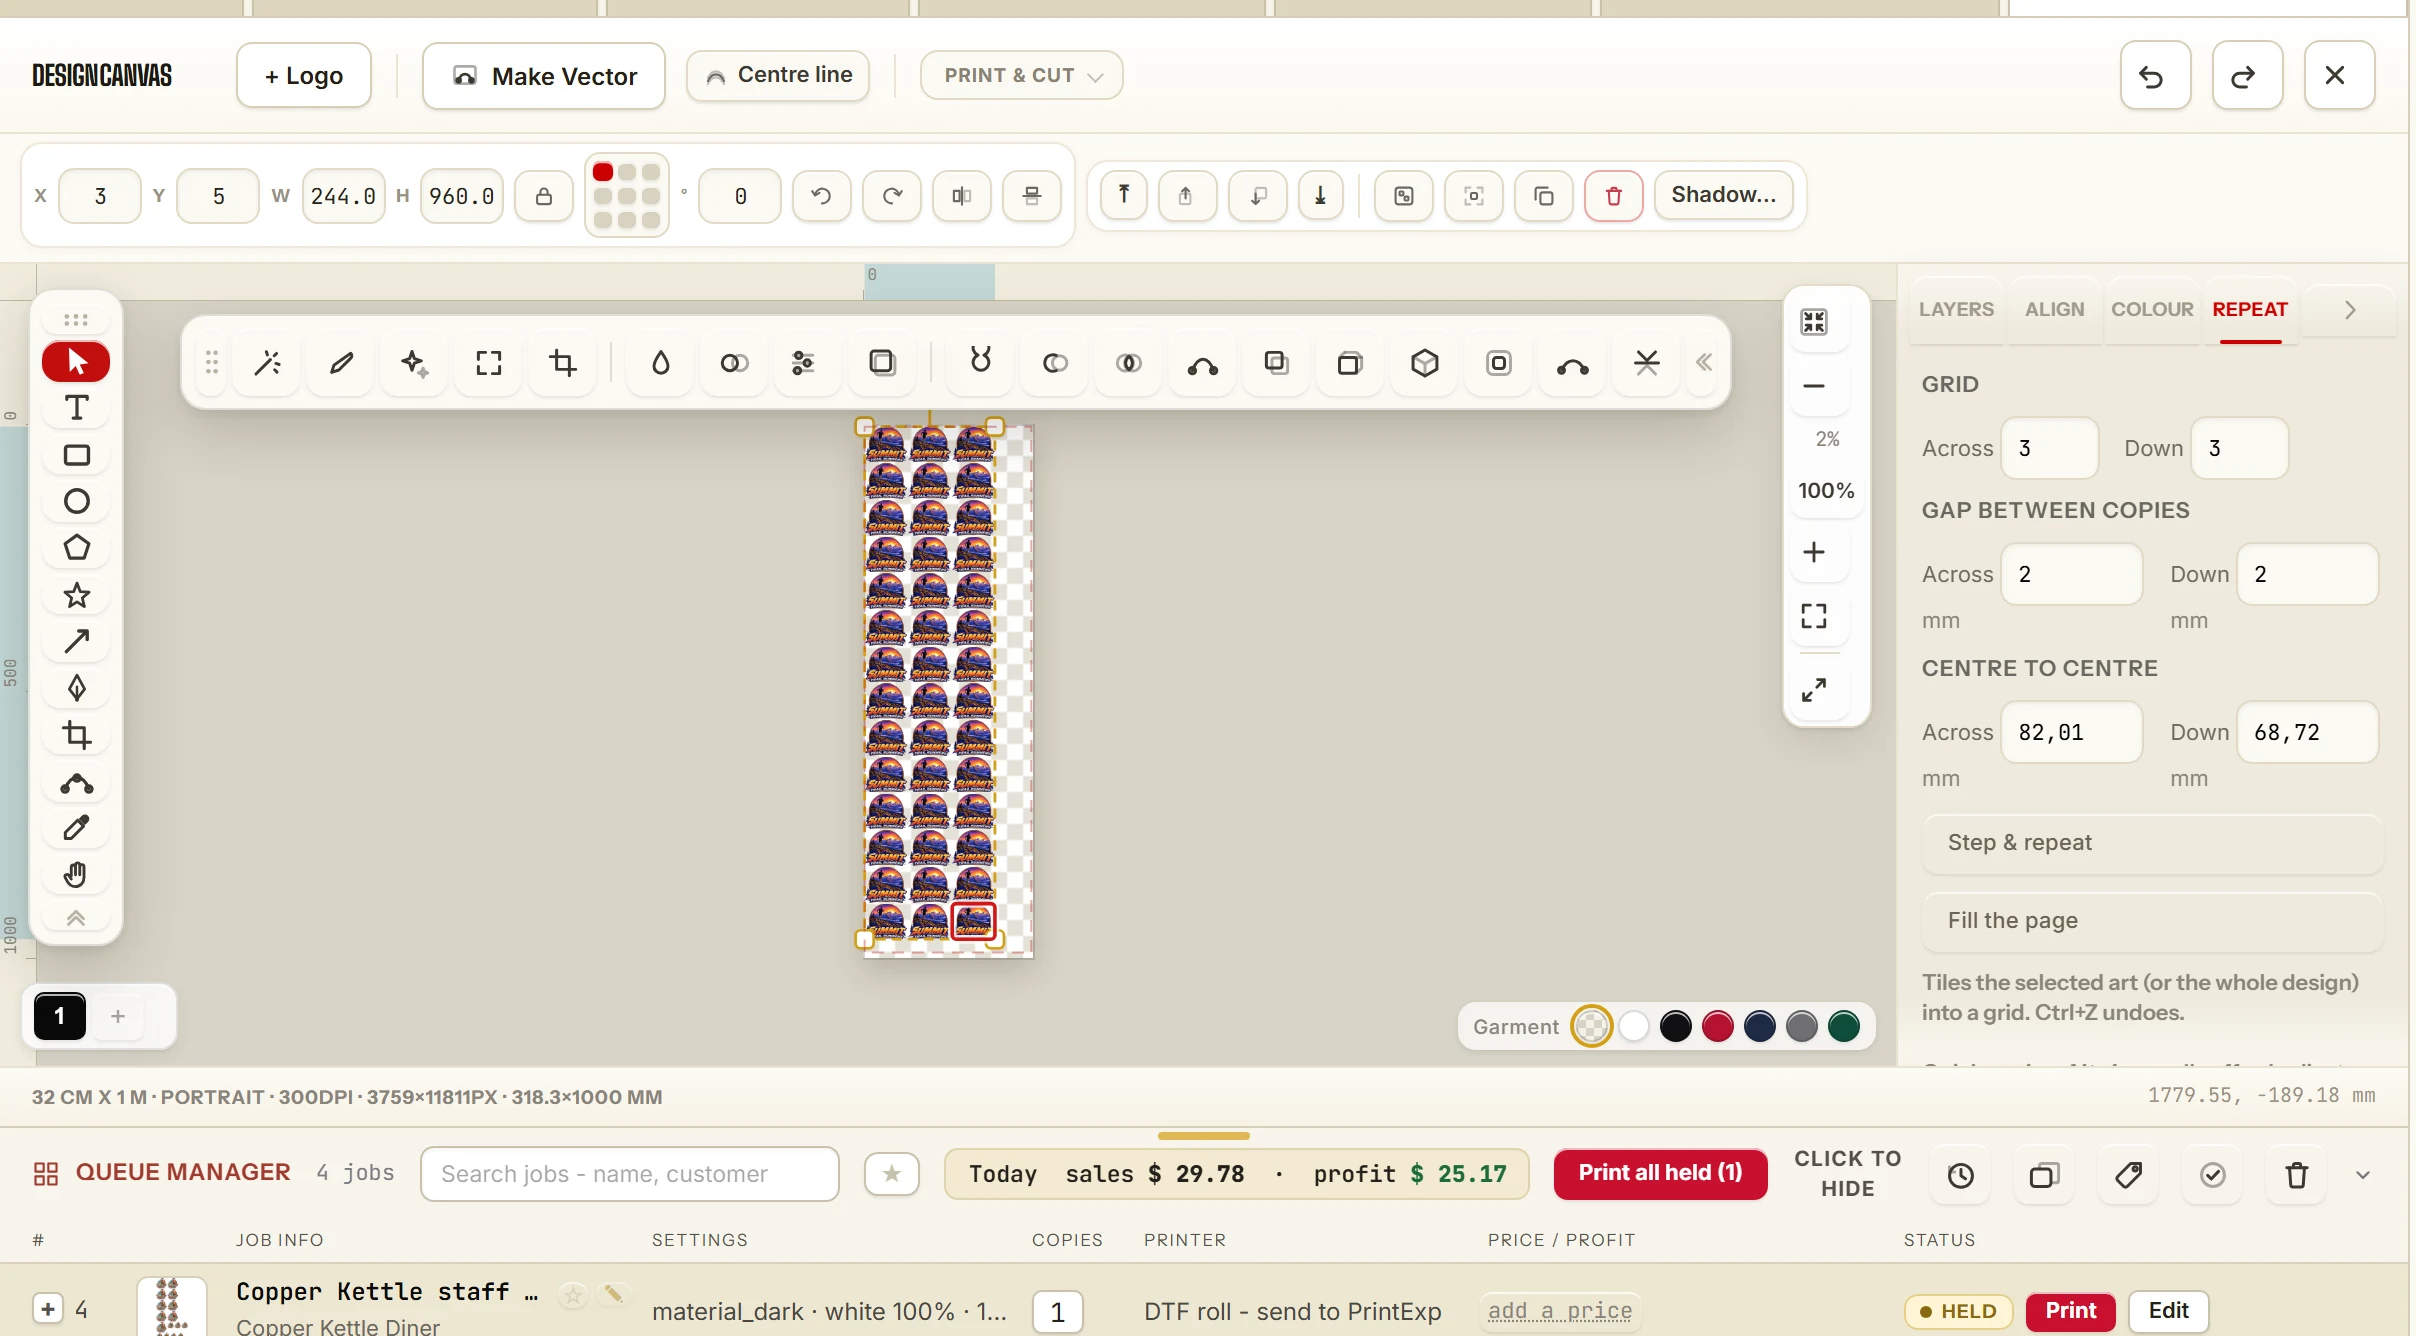
- In the Page box, pick a roll page, like 32 cm x 1 m.
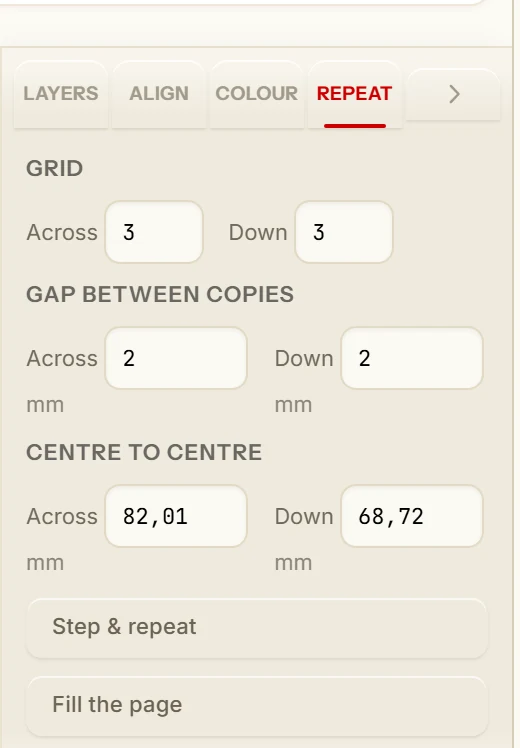
- Open the Repeat tab and press Fill the page
The page fills with as many copies as fit.

8Know the cost before you print
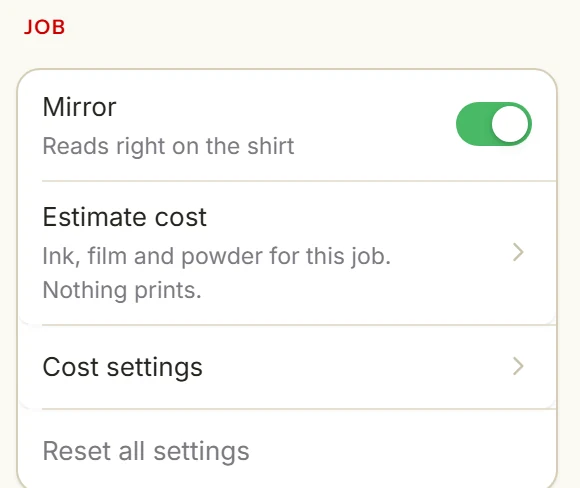
- Open the Print pane. Pick your DTF printer.
- Press Estimate cost
A quote lands in the Queue Manager. Nothing prints.
Estimate cost is in UPrint Design RIP.
9Open a job, and see every drop
- Drag the top edge of the Queue Manager up, to see more rows.
- Press + on a job to open its card.
The card shows each ink in ml, the film in metres and the powder in grams, and what each one cost. It is counted from every dot the job prints.
10Save the job for your printer
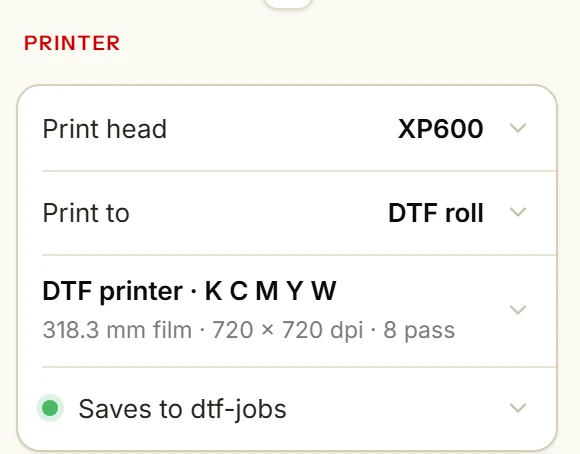
- Press Save DTF job
The job goes to the folder your printer's software prints from, and the row says PRINTED with its profit.
11A repeat order: put a past job back in the queue
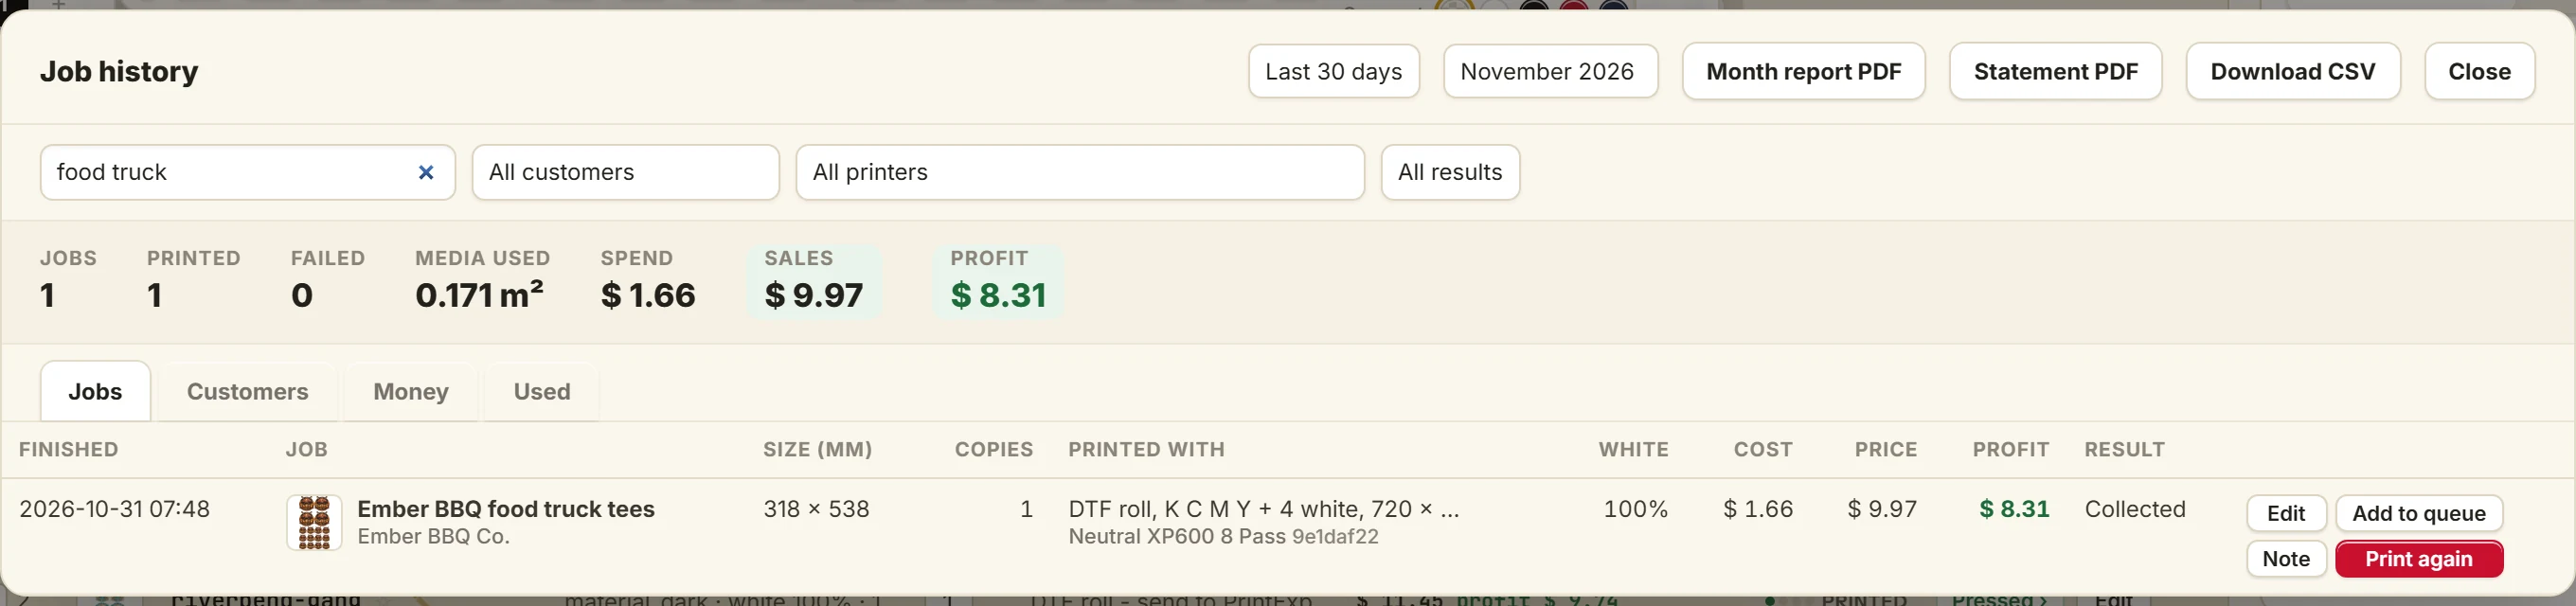
- Press the clock button to open Job history.
- Type the job or the customer in the search box.
- Press Add to queue
The job waits in the Queue Manager as HELD, even after you close the app. Press Print when the film is loaded.
12Name the job and the customer
- Click the pencil beside the job's name.
- Type the name and the customer, then save.
Type the customer once. The app remembers them, so all their jobs add up in one place.
13See the price and the profit
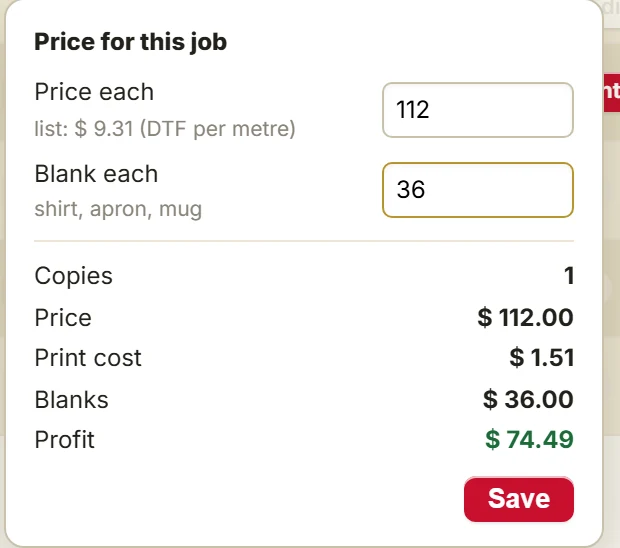
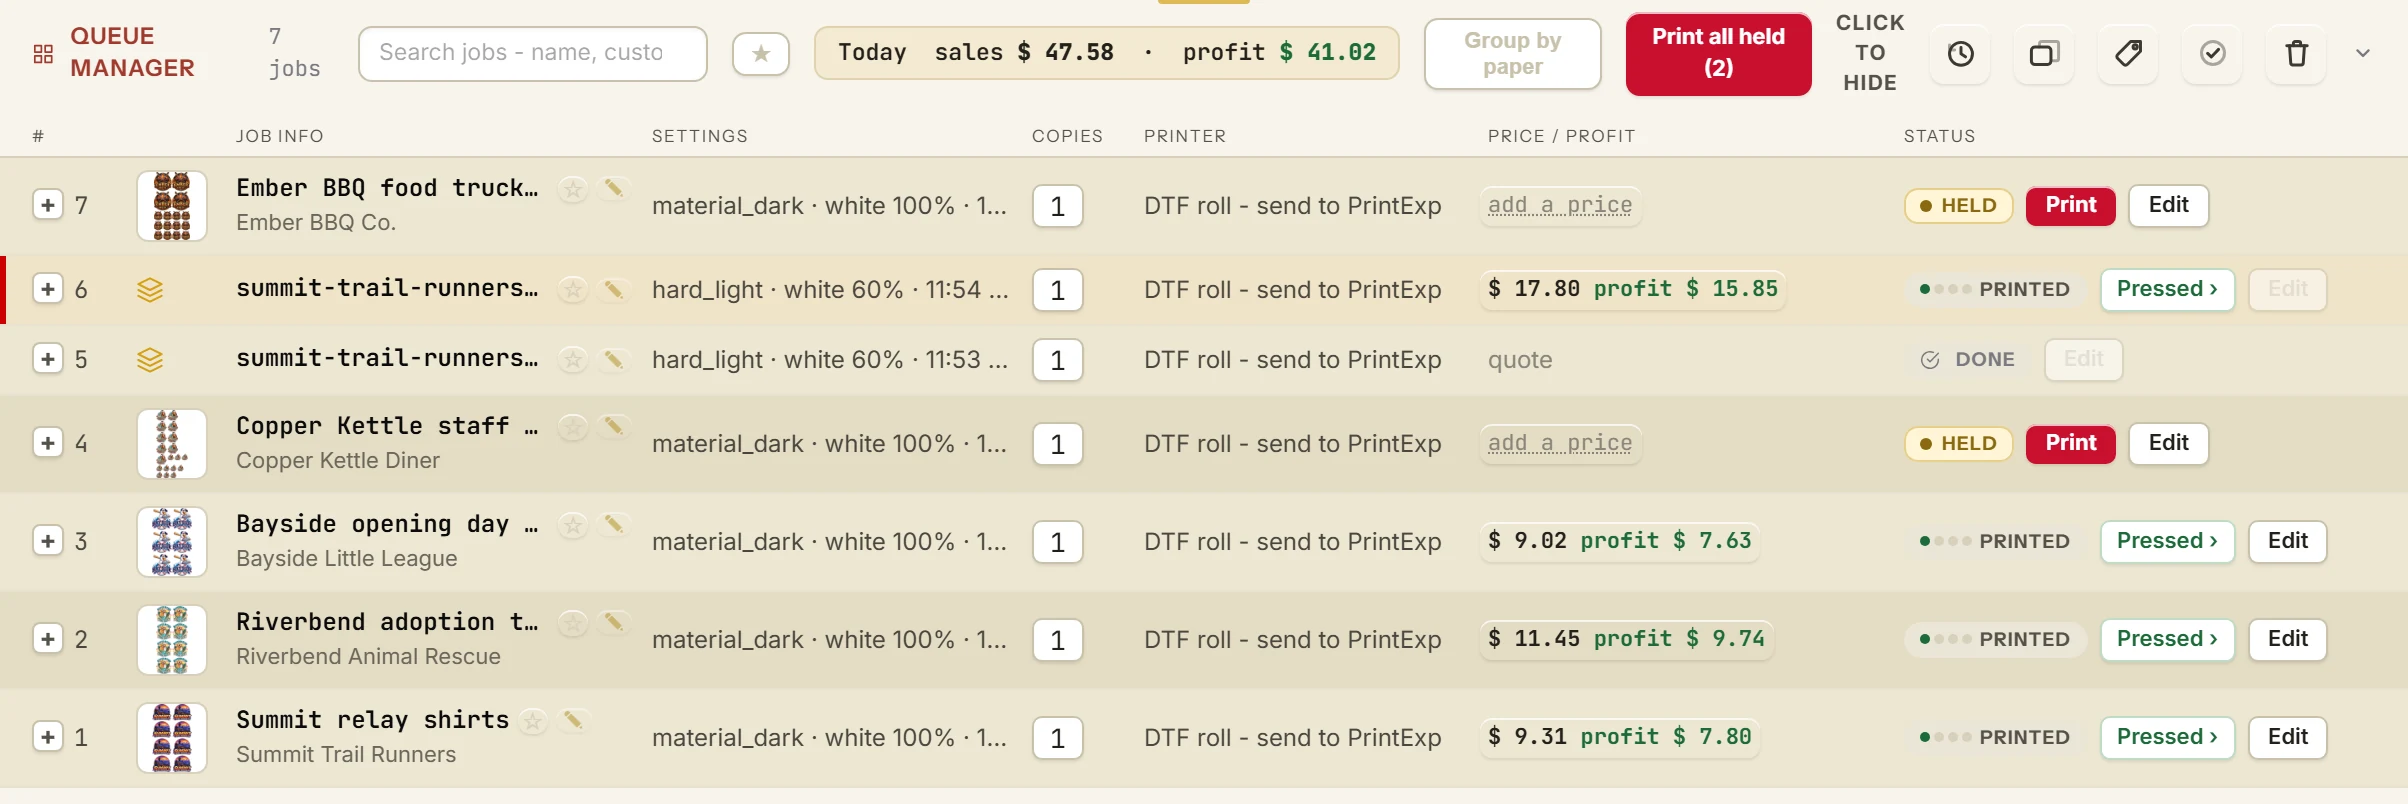
Every DTF job sells for the metres of film it used, times your price per metre. Its profit sits beside it.
- Pressing the shirts too? Click the job's price.
- Type what you charge for the order, and what the blanks cost you.
- Press Save
The profit follows: the price, less the print, less the blanks.
14Follow each job to the door
- Off the press: click Pressed
- Packed: click Packed
- The customer has it: click Collected
Clicked too soon? Right-click the job and step back.
15A transfer comes out wrong: mark it
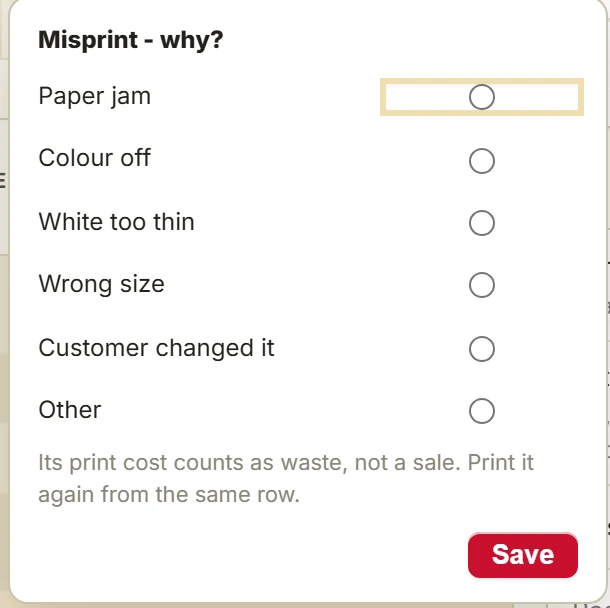
- Right-click the job and pick Misprint...
- Pick why, like White too thin.
- Press Save
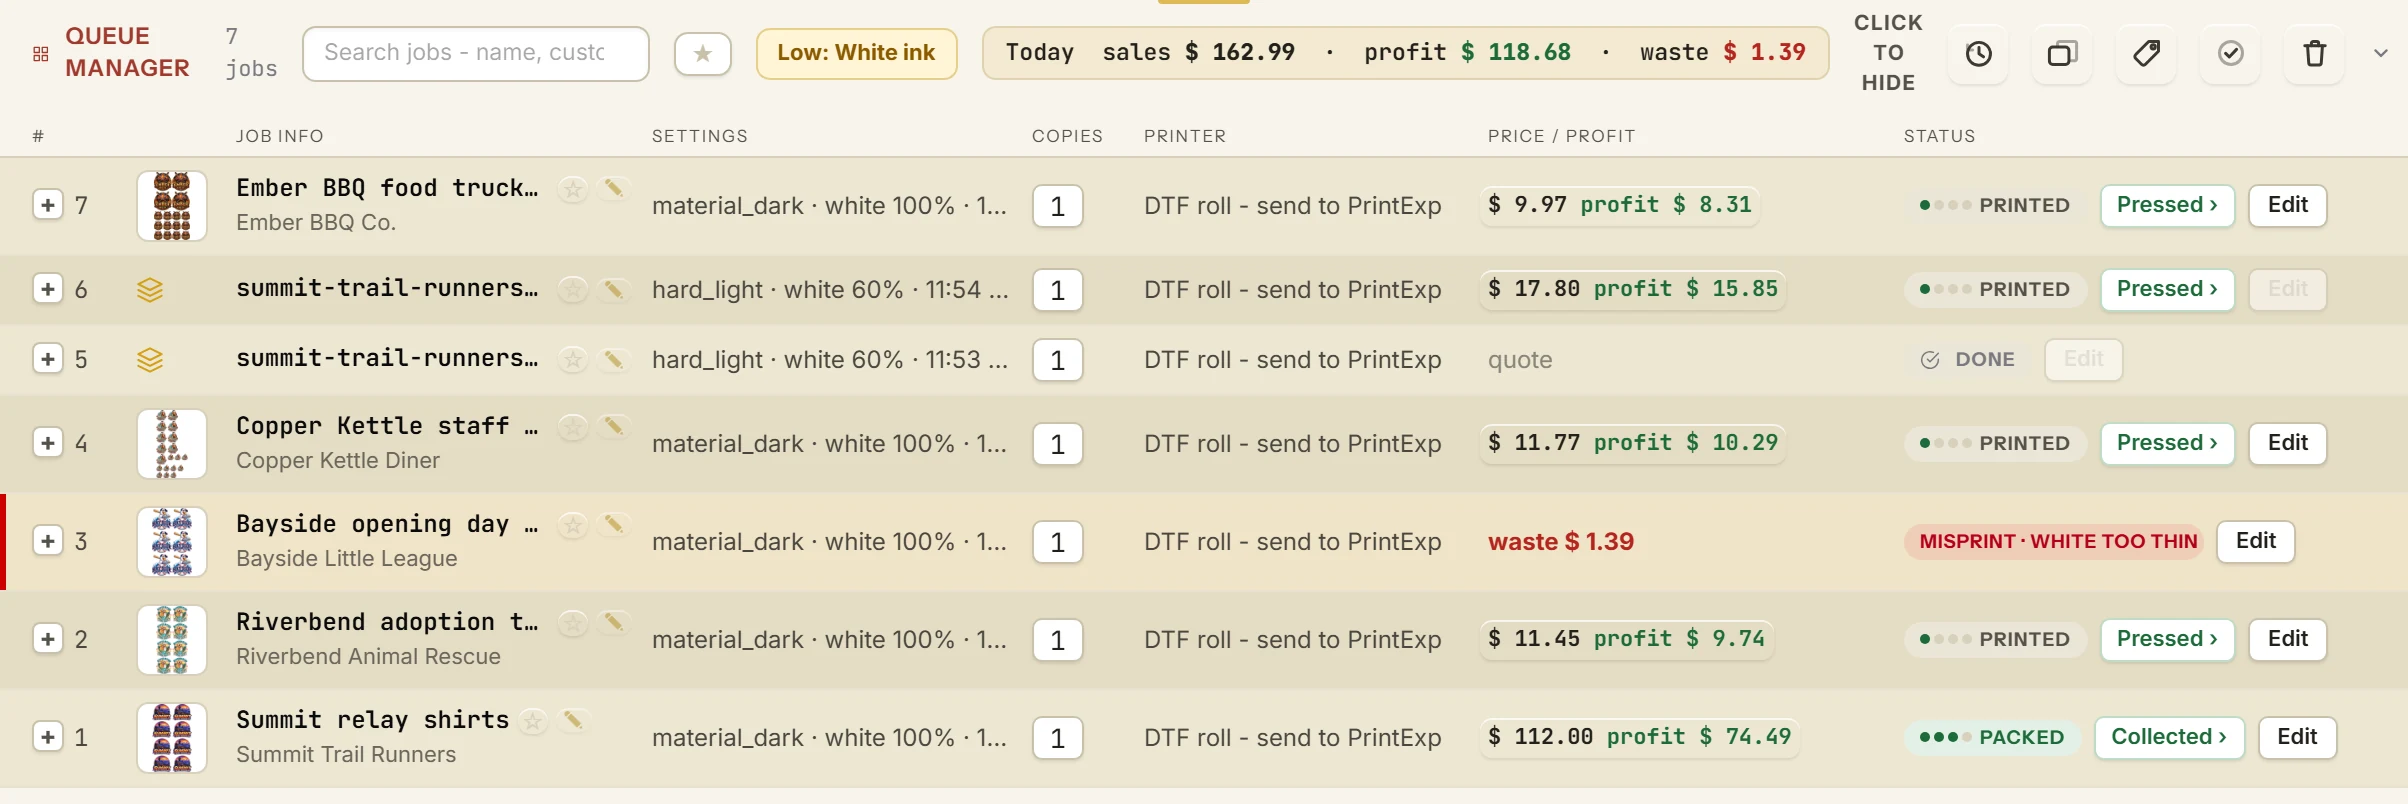
The ink, film and powder of that job count as waste, not a sale. Your profit stays true.
16Read the Today bar, and group by film
- At the top of the Queue Manager, read what today's jobs sold, made and wasted.
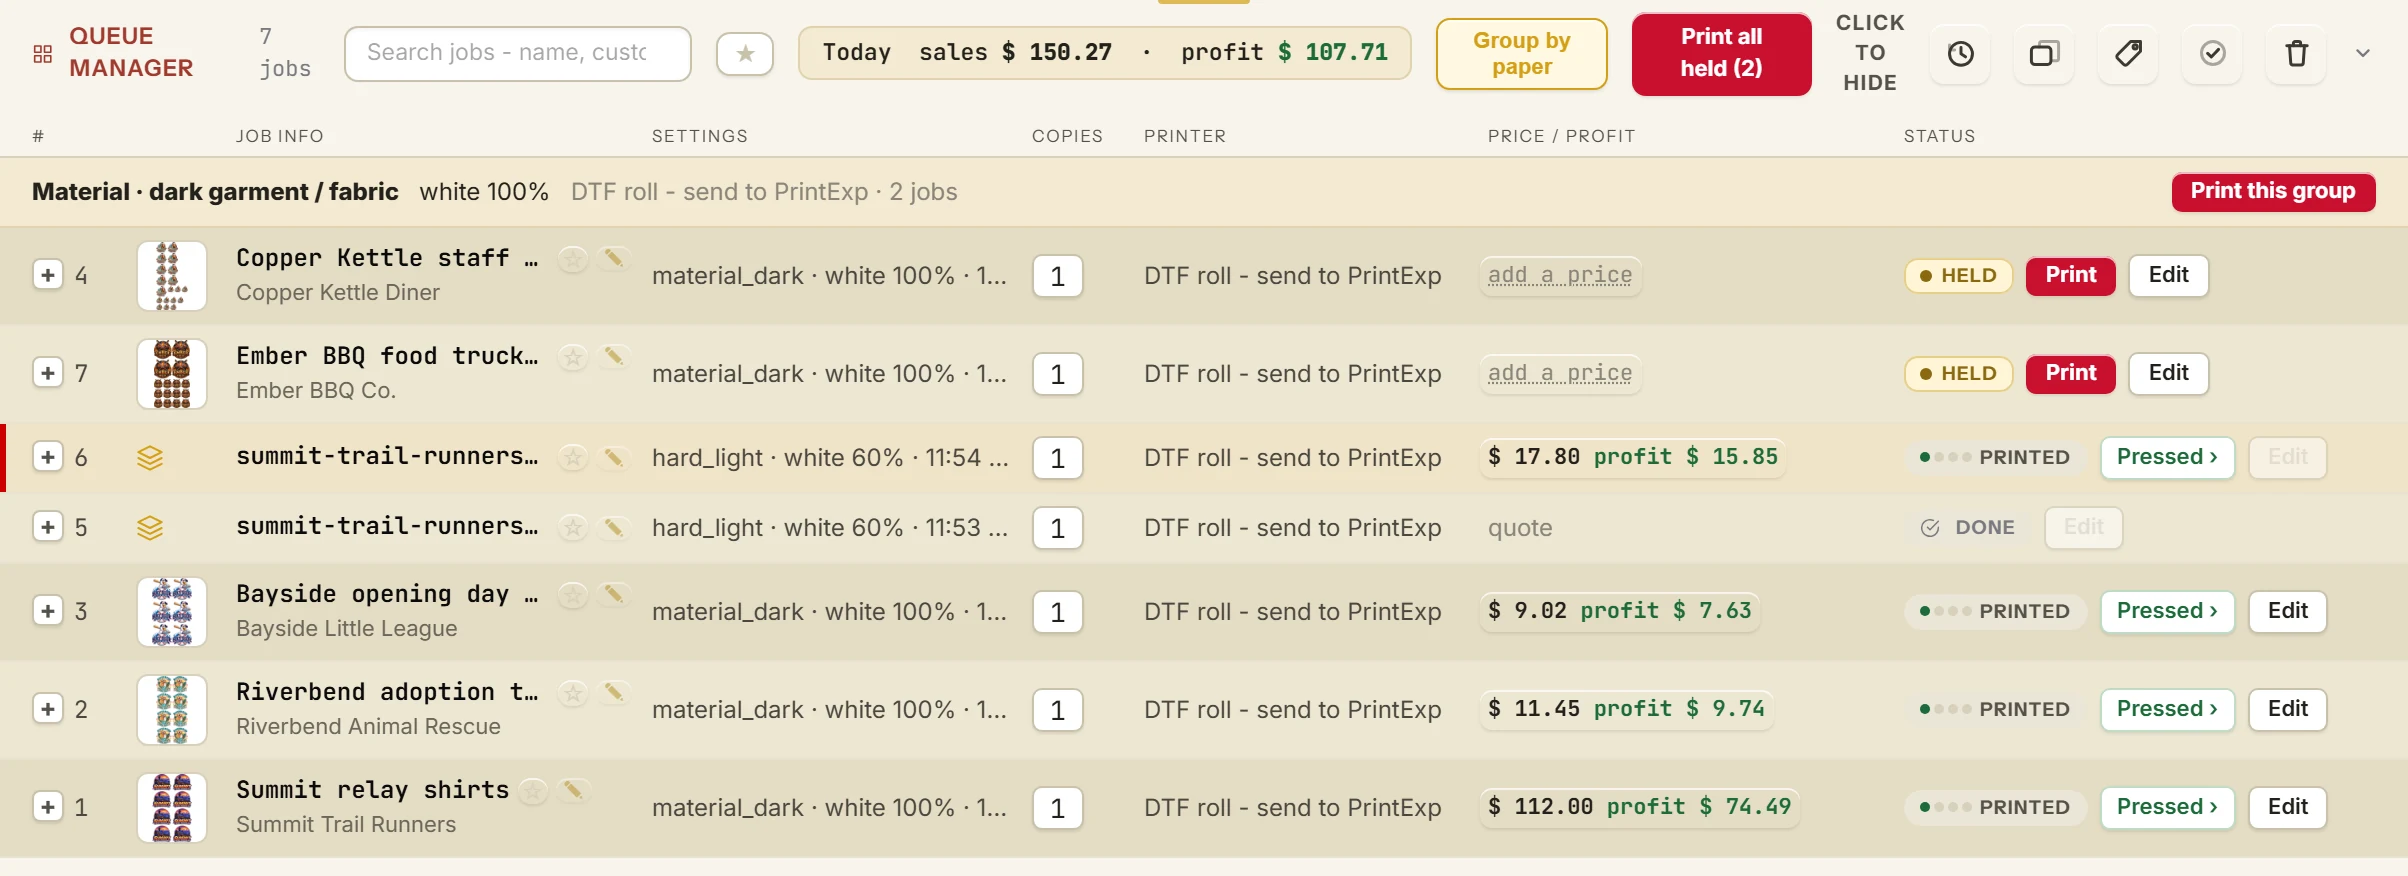
- Press Group by paper to put held jobs on the same printer and settings together.
- Load the film once, and press Print this group
Search by job or customer, star the gang sheets you print again and again, and right-click to add a note.

Part 3: Job history
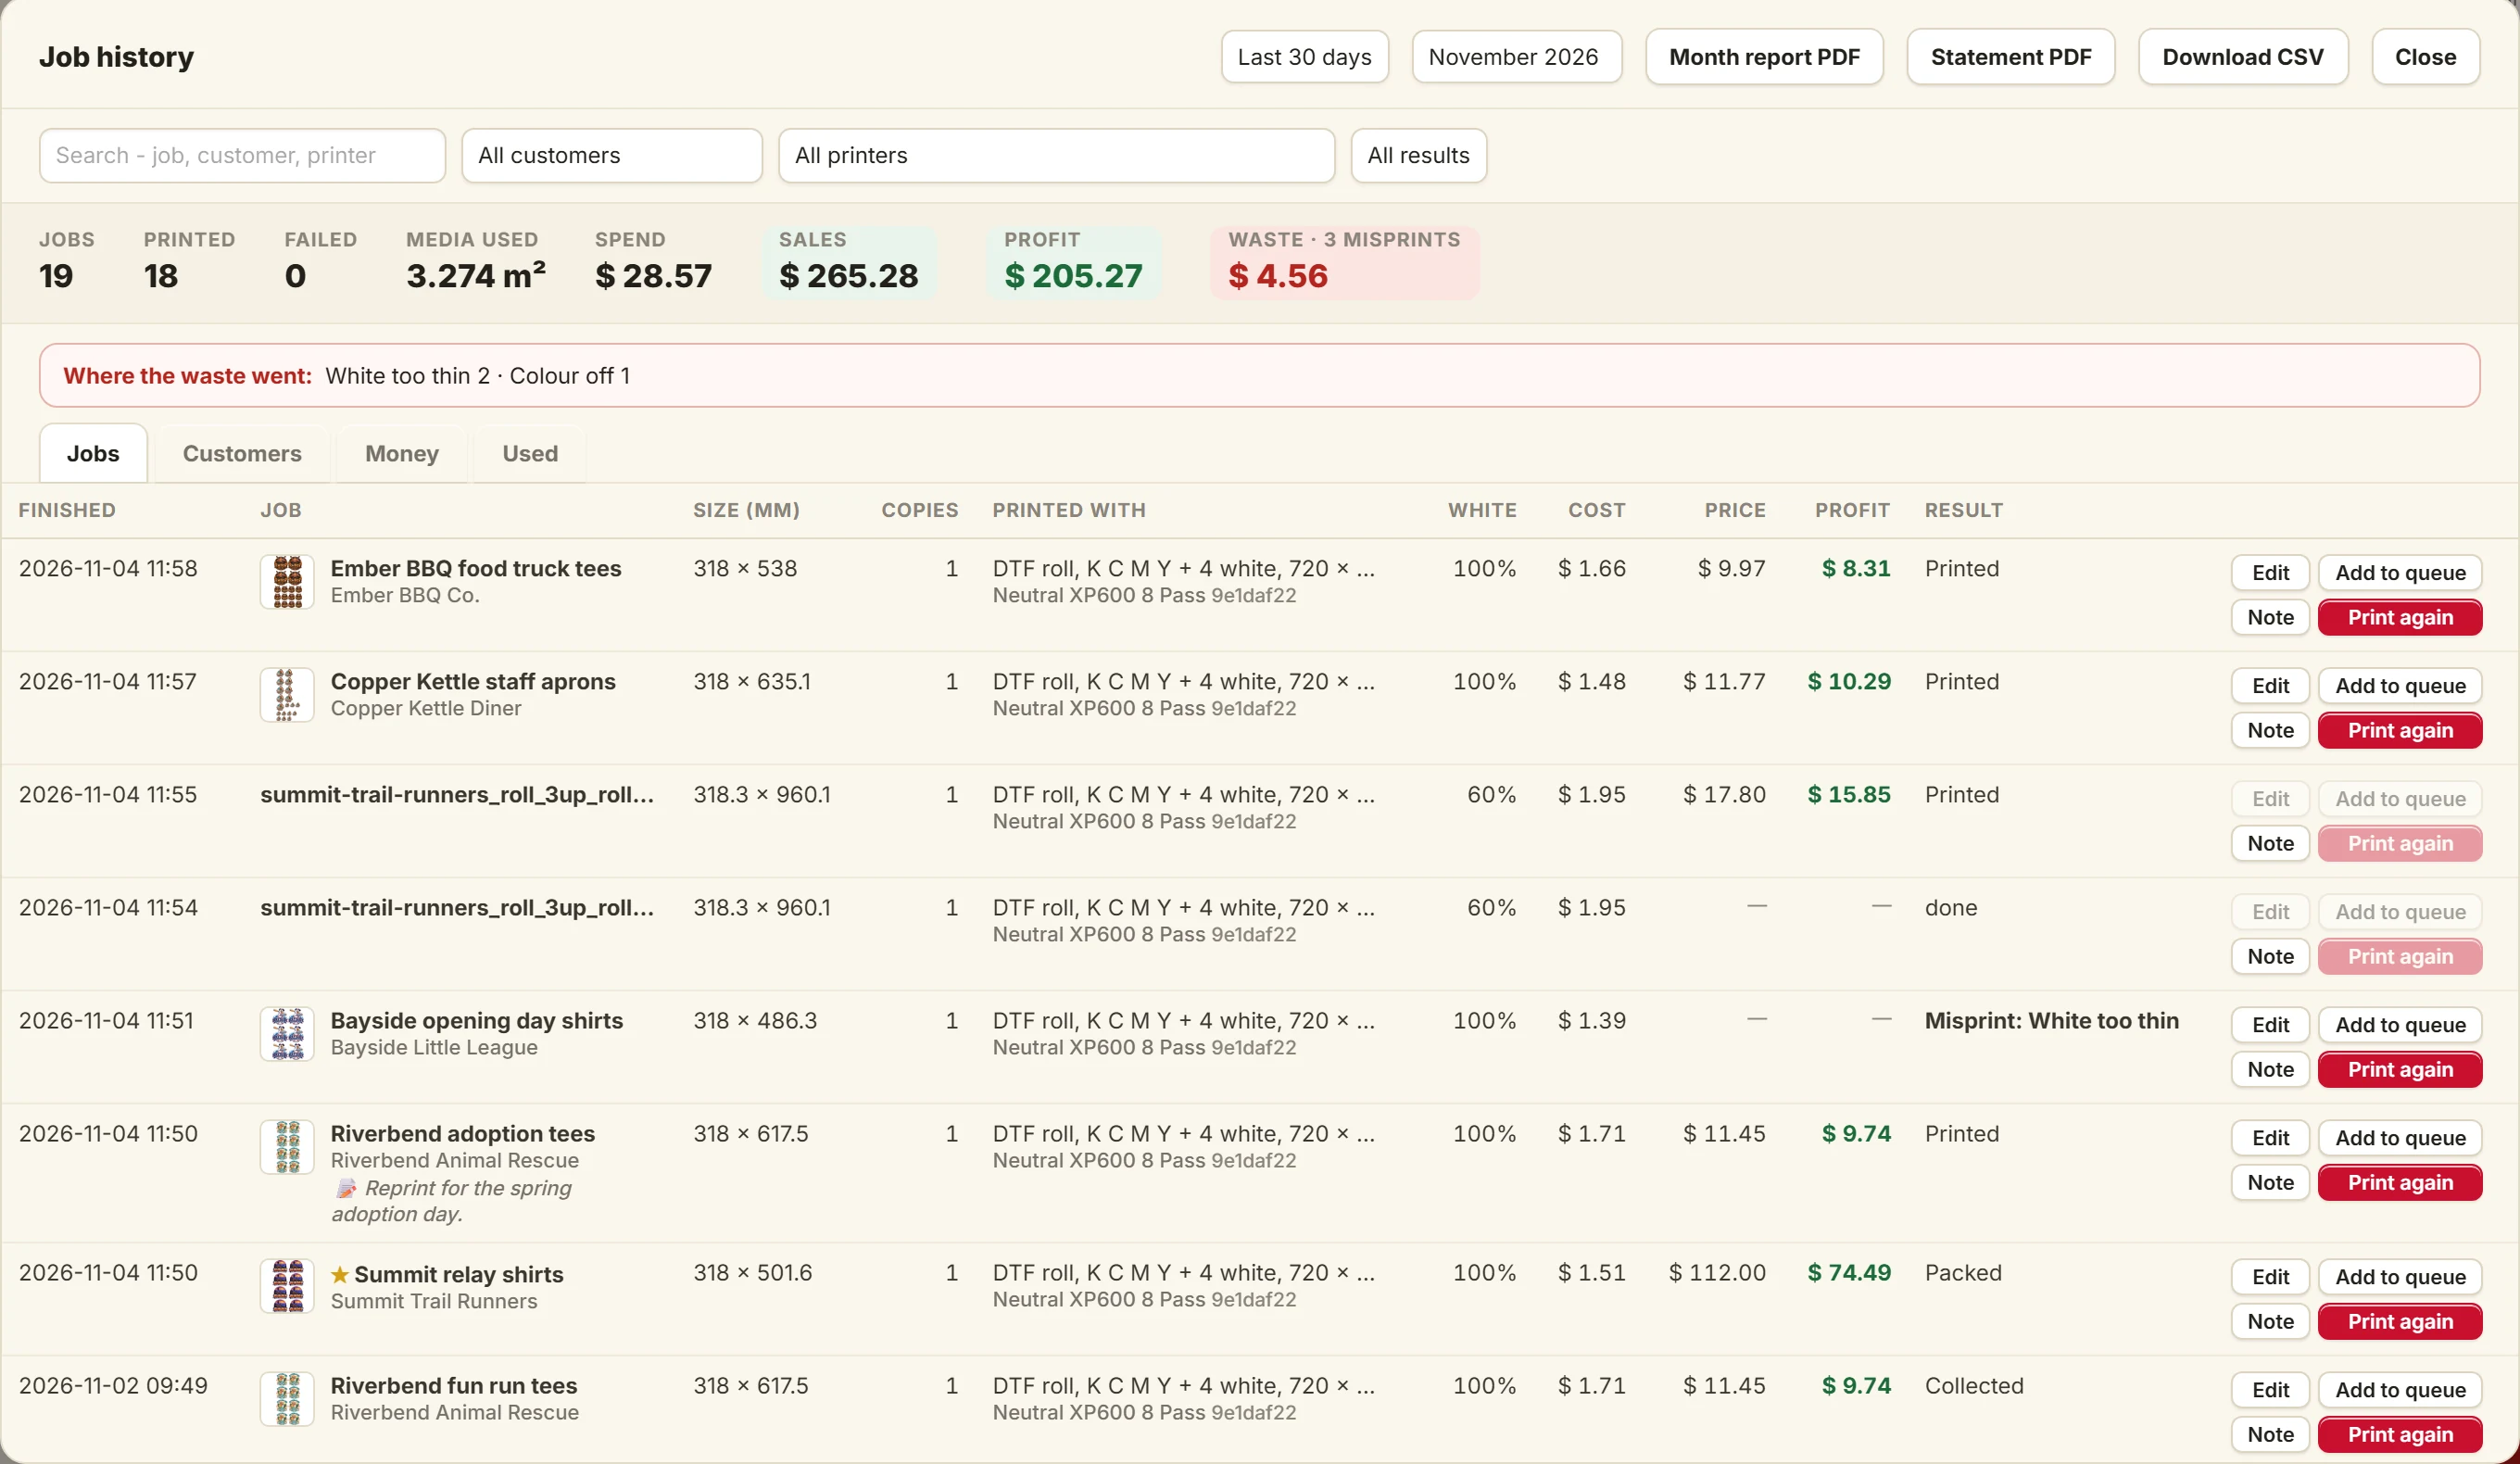
Every finished job is kept in Job history, with its totals on top: jobs, media, spend, sales, profit and waste.
17Find any past job
- Pick the dates, a customer, a printer or just the misprints. The totals follow.
- Open a past job: Edit, Add to queue, Print again or Note.
- Press Download CSV for your spreadsheet.
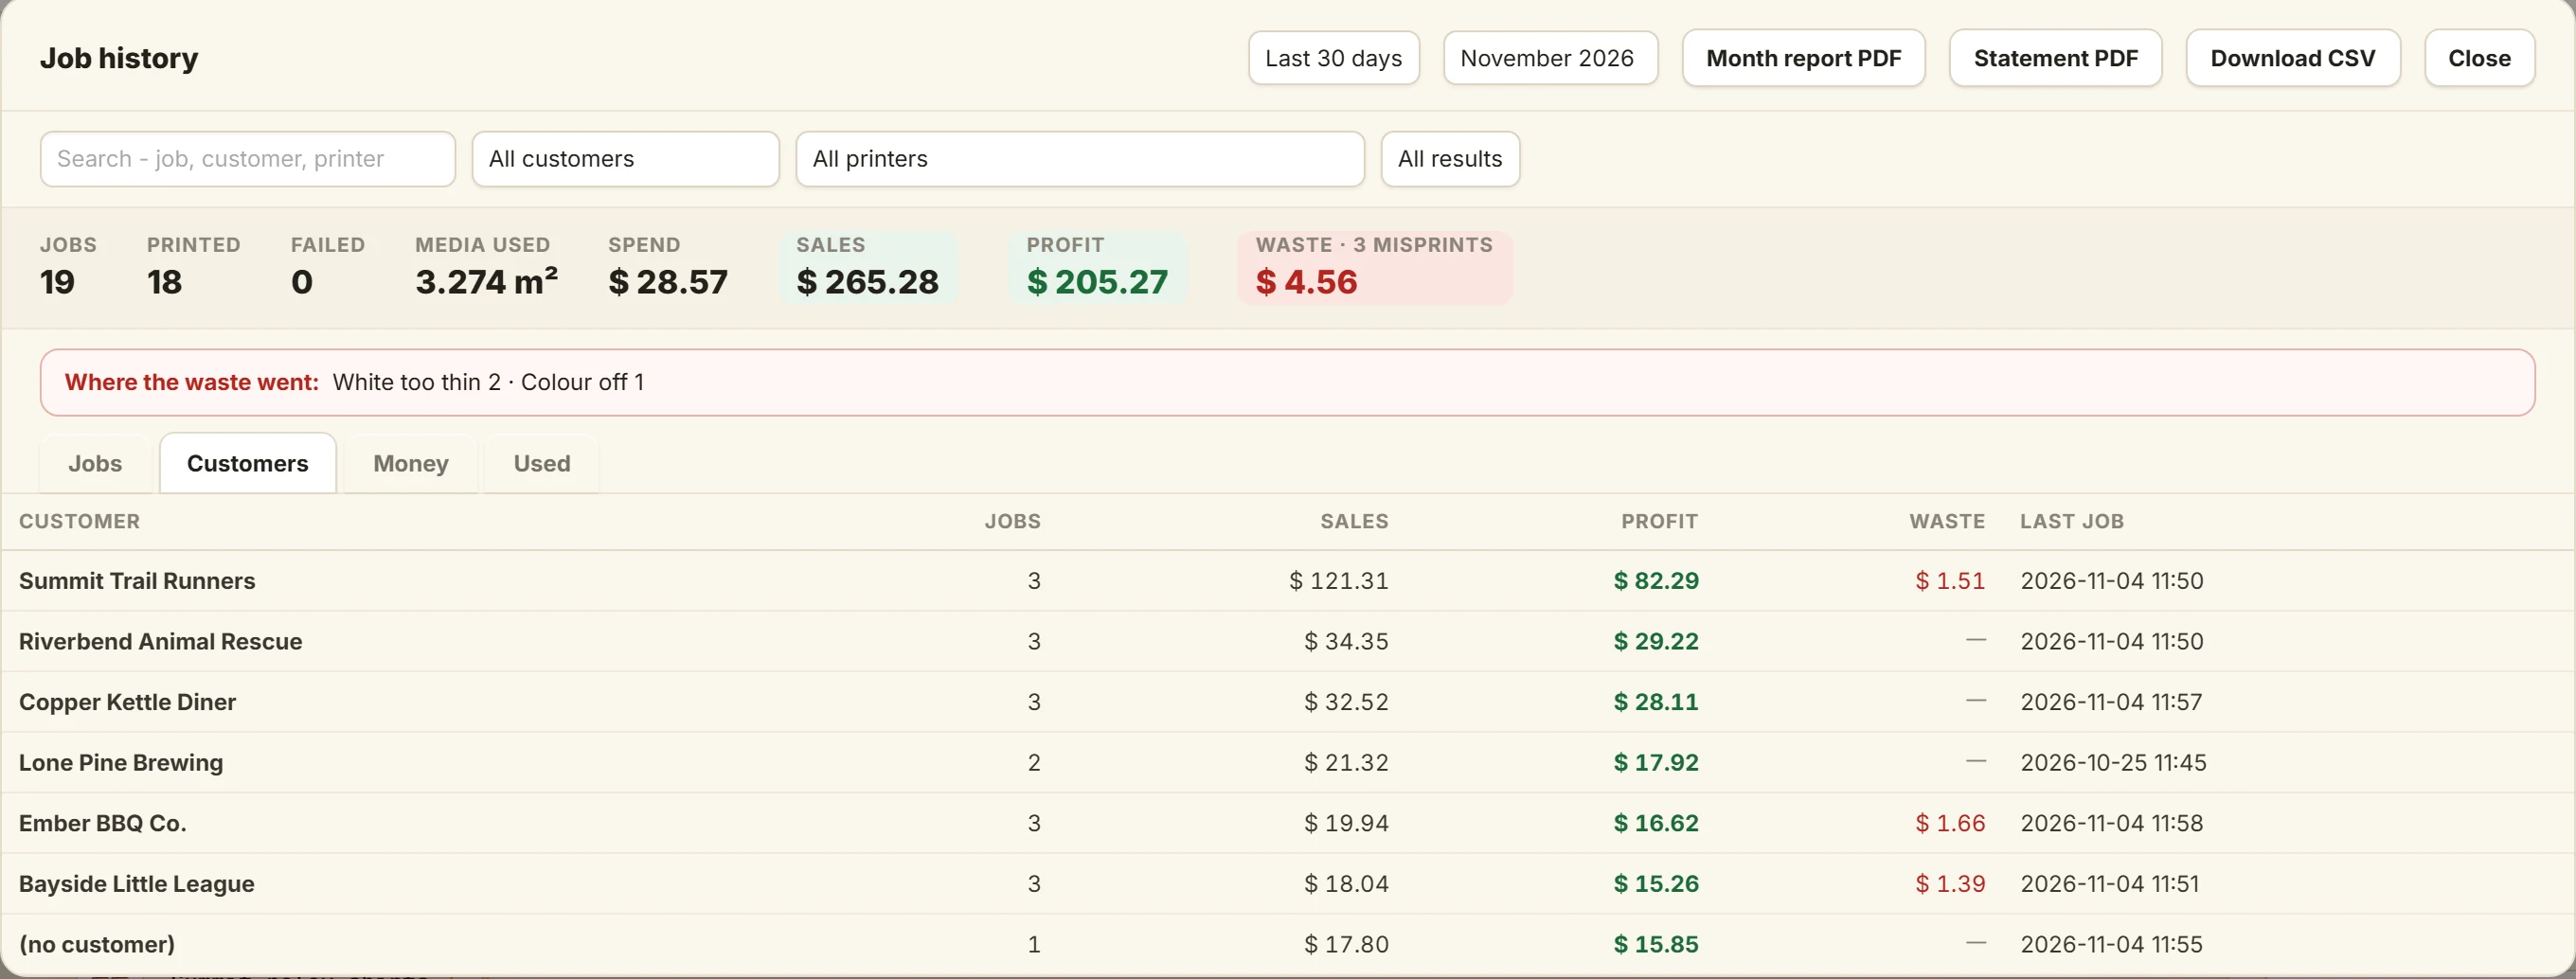
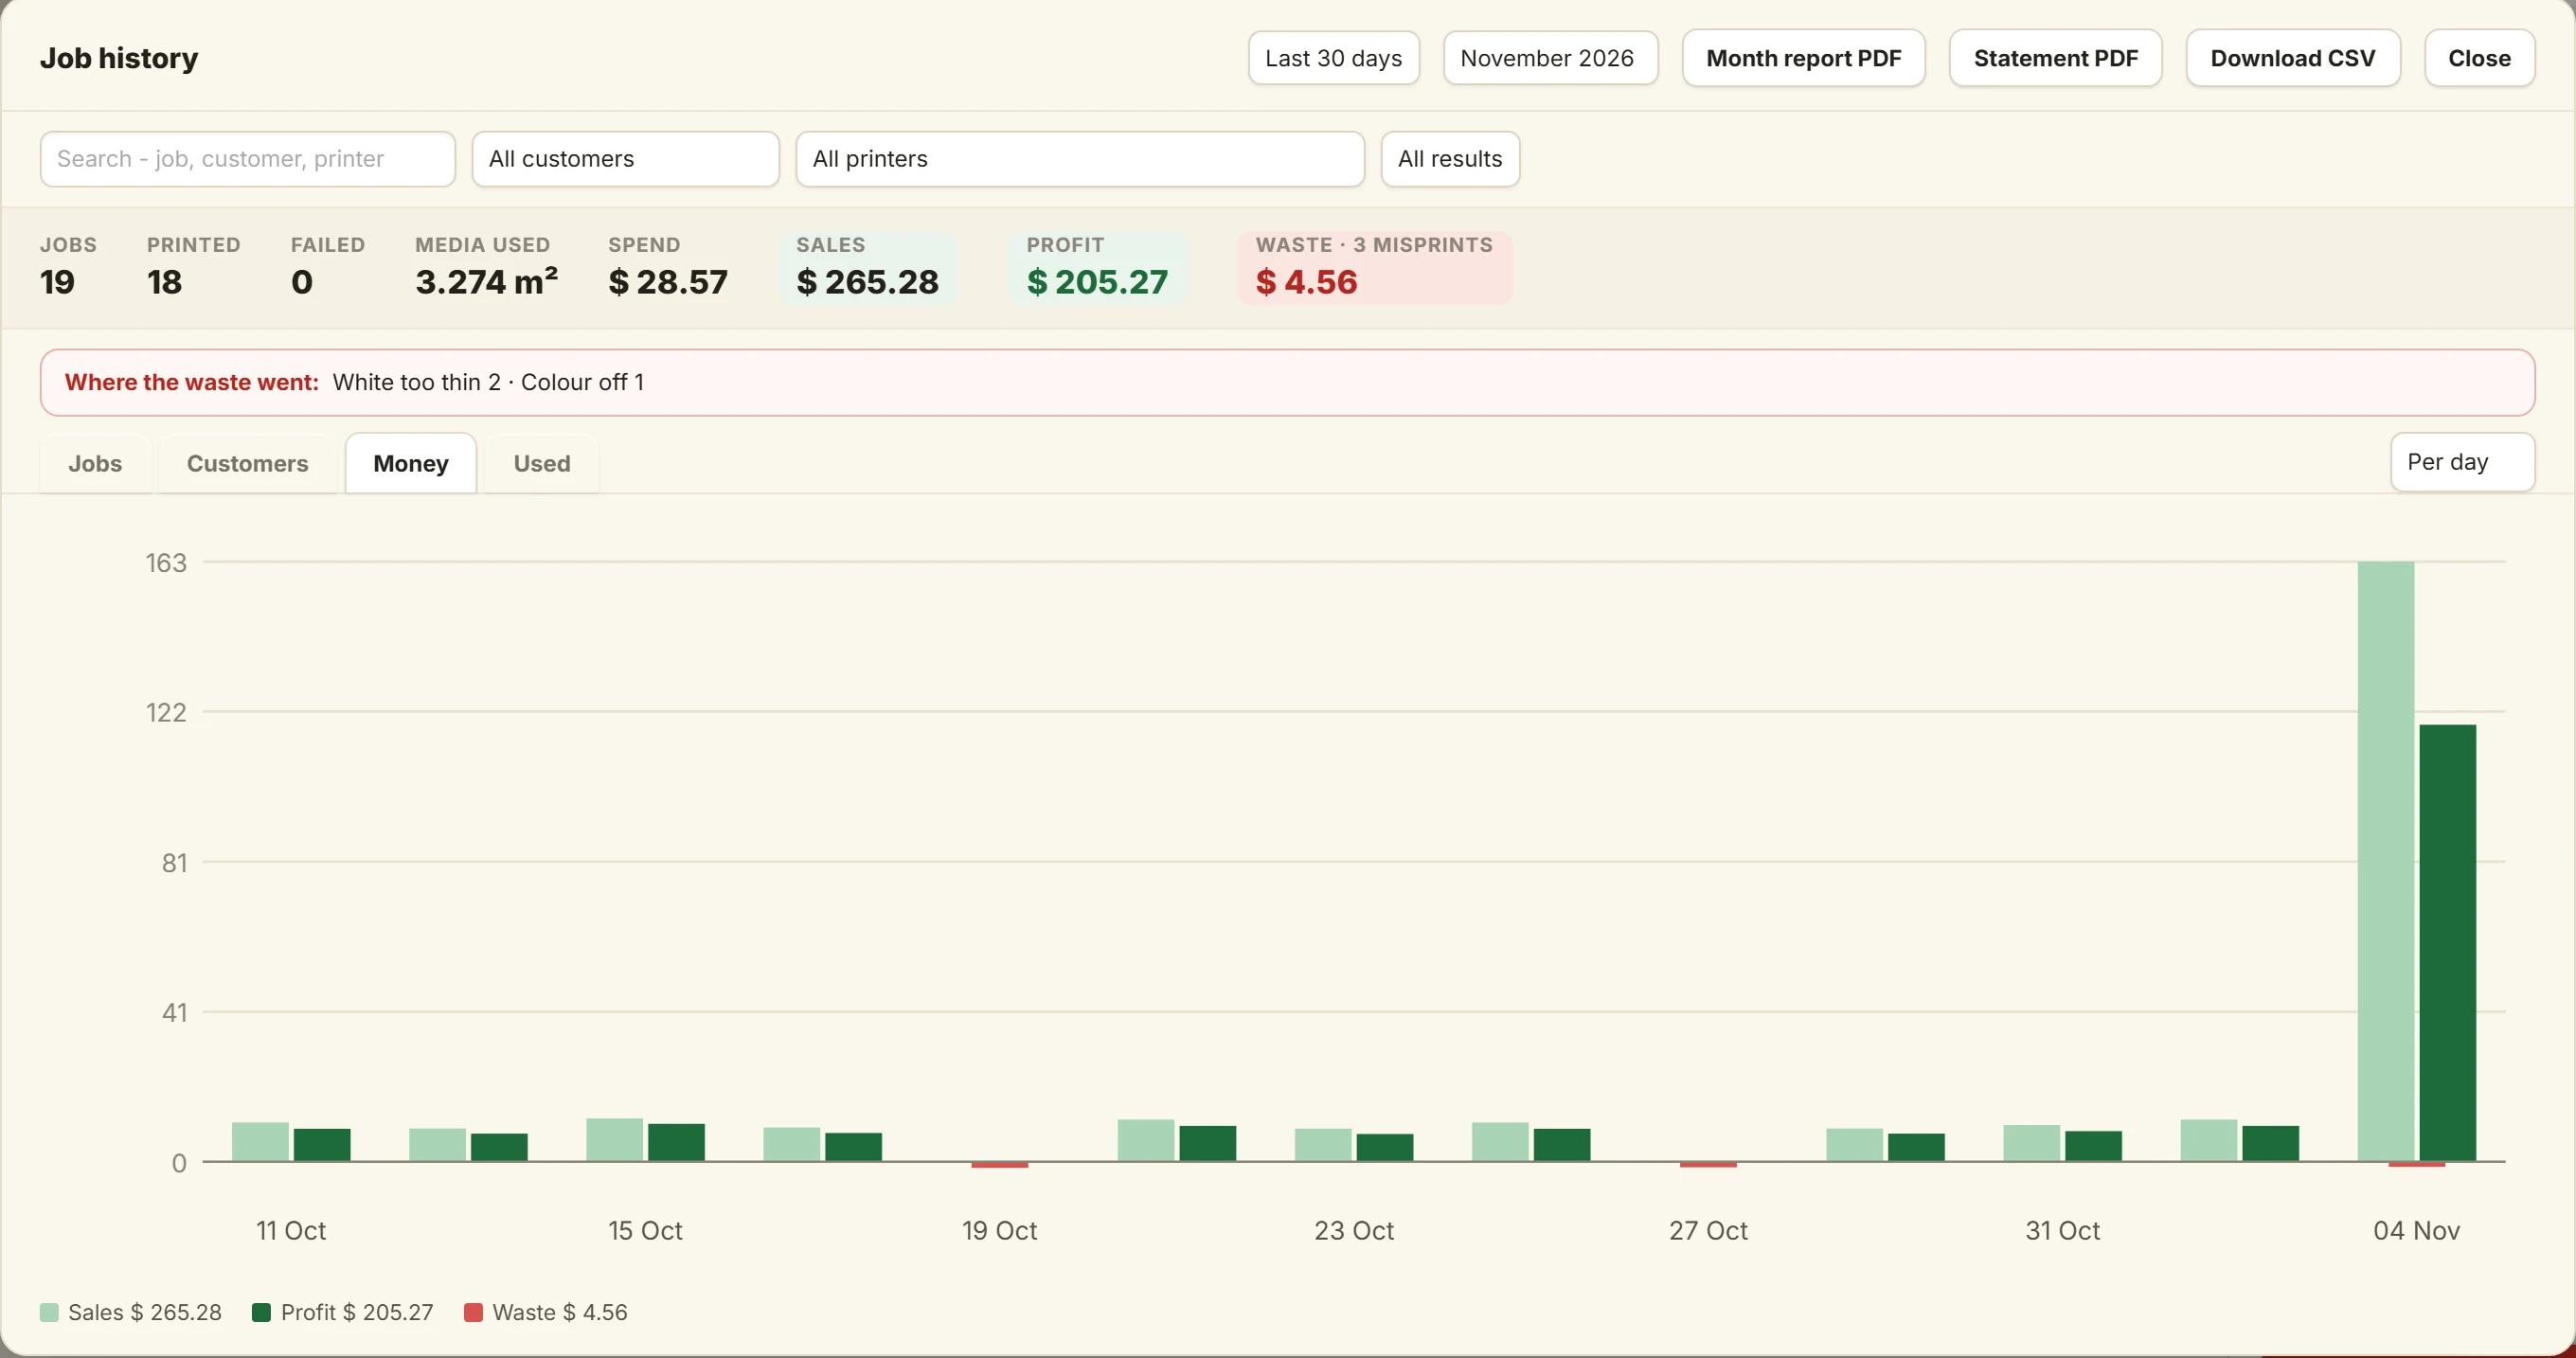
18Your best customers, and your money
- Open the Customers tab: your best customers first, with jobs, sales, profit and waste.
- Open the Money tab: sales and profit per day, week or month, and where the waste went.
19Know when to refill
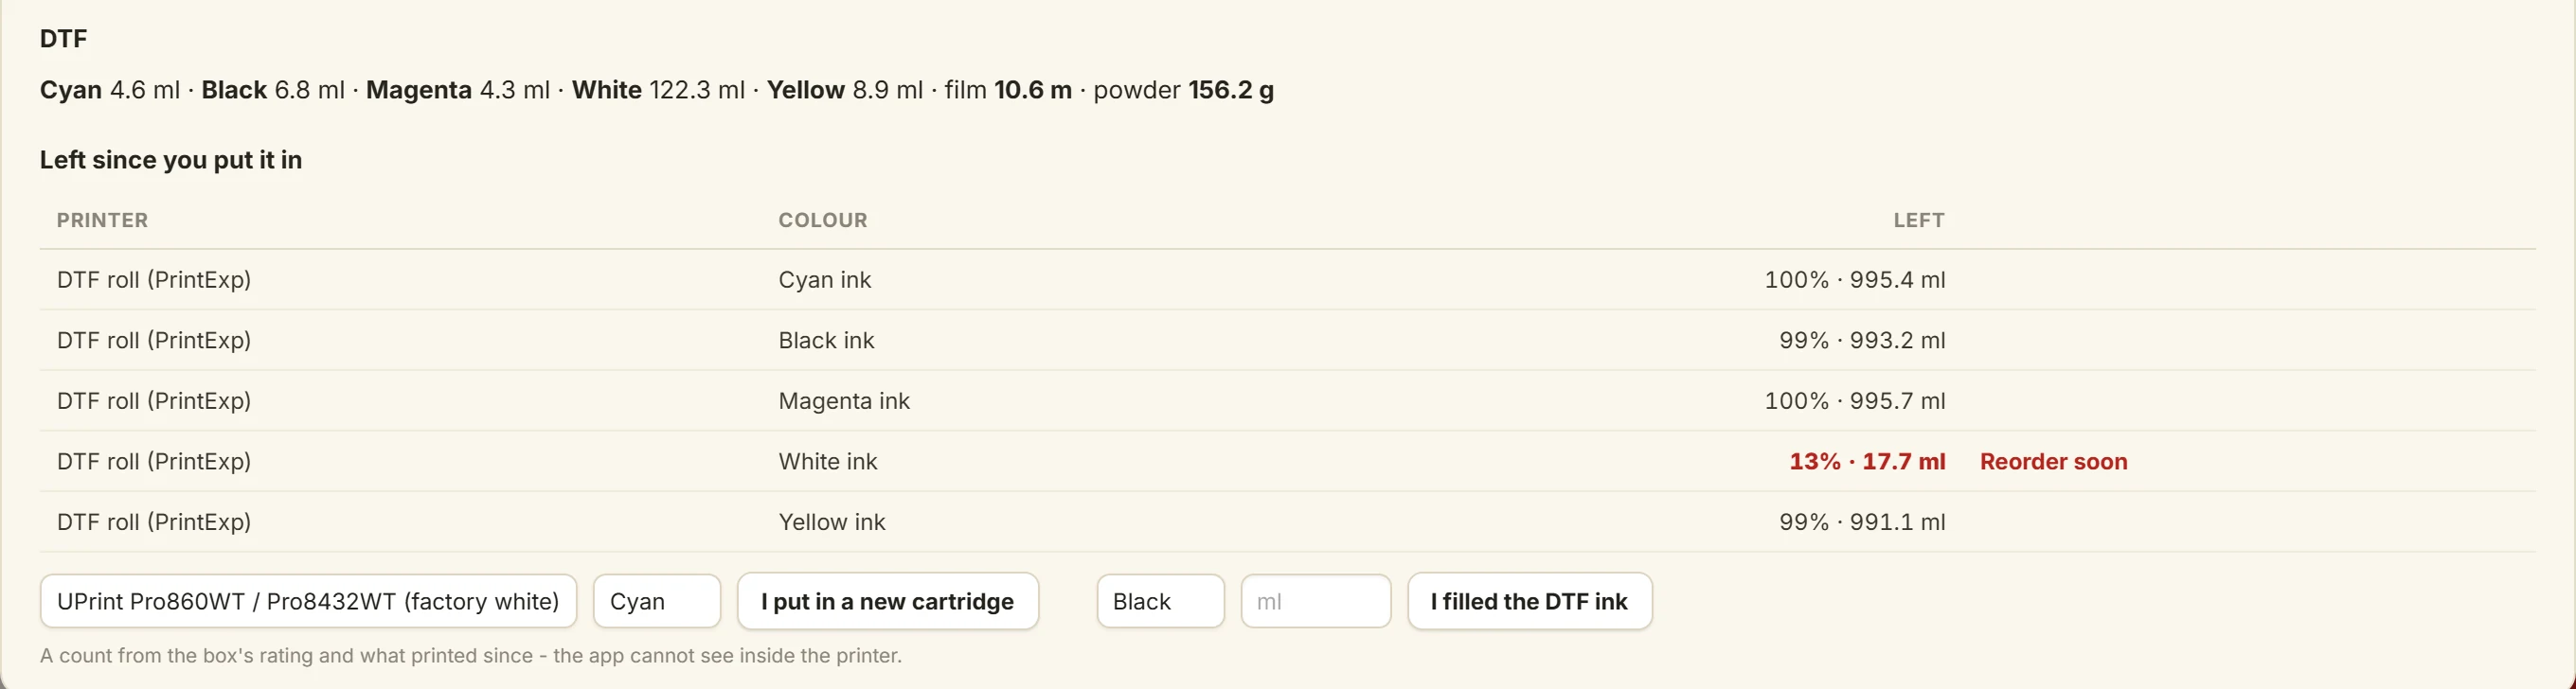
The Used tab shows the ink you used, colour by colour, in ml, the metres of film and the grams of powder.
- When you fill an ink tank, pick the colour and type the ml.
- Press I filled the DTF ink
Under a fifth left, the Queue Manager shows Low: and the colour.
It is a count from your jobs, not a reading from the printer.
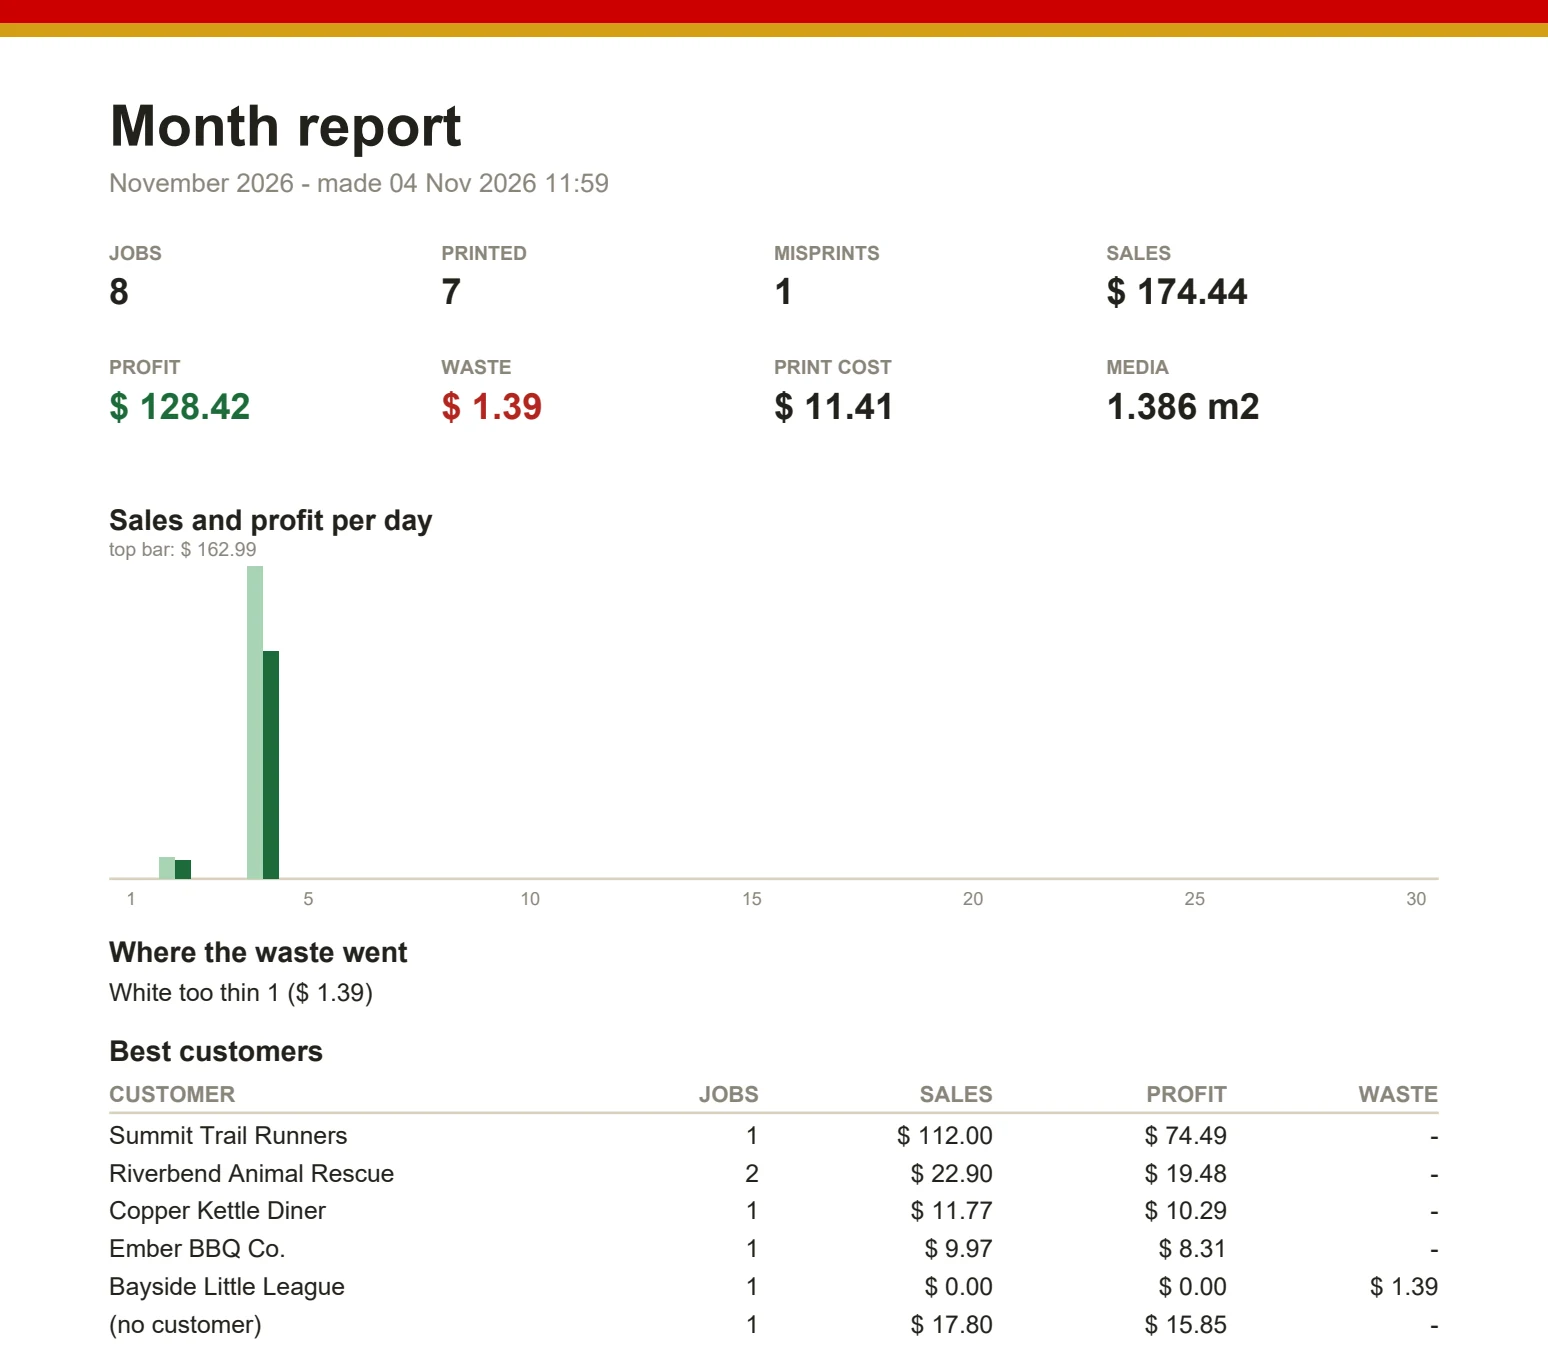
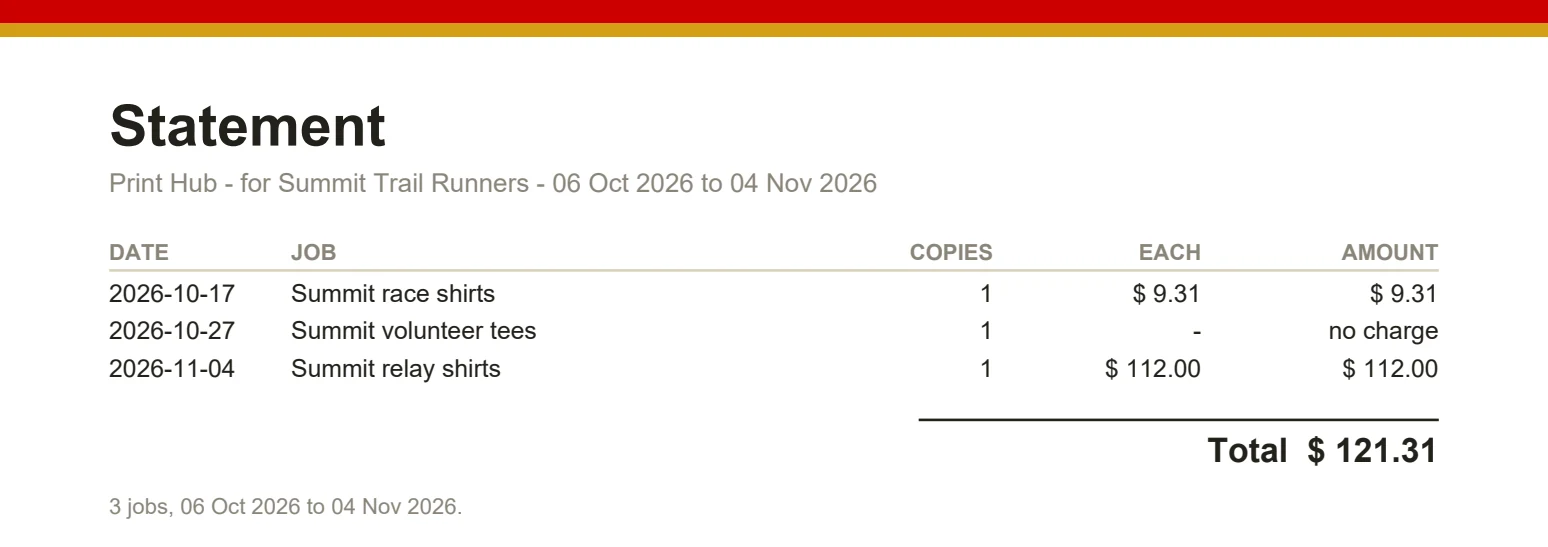
20The month report, and a statement
- In Job history, press Month report PDF
- For a customer who pays later, pick the customer and press Statement PDF
The report is one page: jobs, sales, profit, waste, your best customers and what you used.
Part 4: Let the AI fill it in
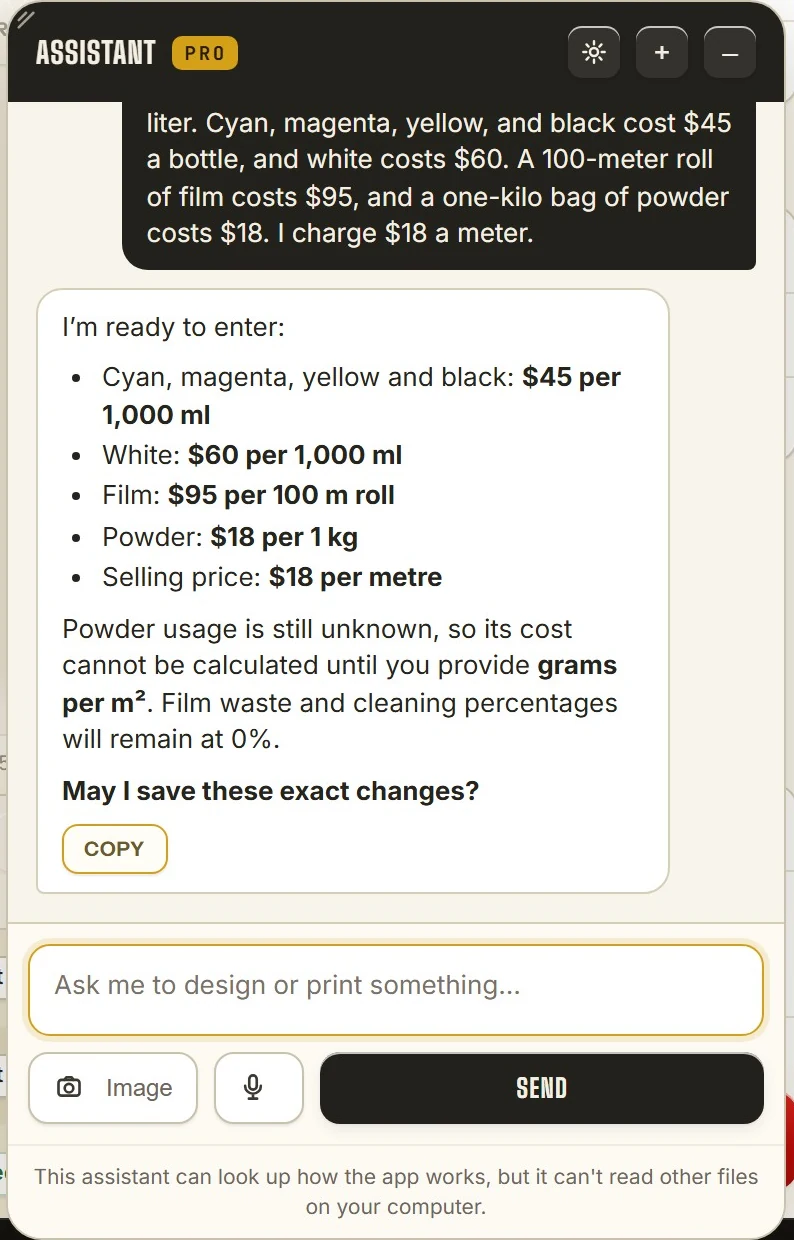
Too busy to type it all? Press the mic in the AI assistant and say it. The assistant runs on your own OpenAI key.
21Say your costs
- Press the mic, and say your costs, like you would to a person.
- Press Send
- Read what it found, and say yes to save it.
The assistant saves only when you say yes. A number you did not give stays empty: it does not guess.
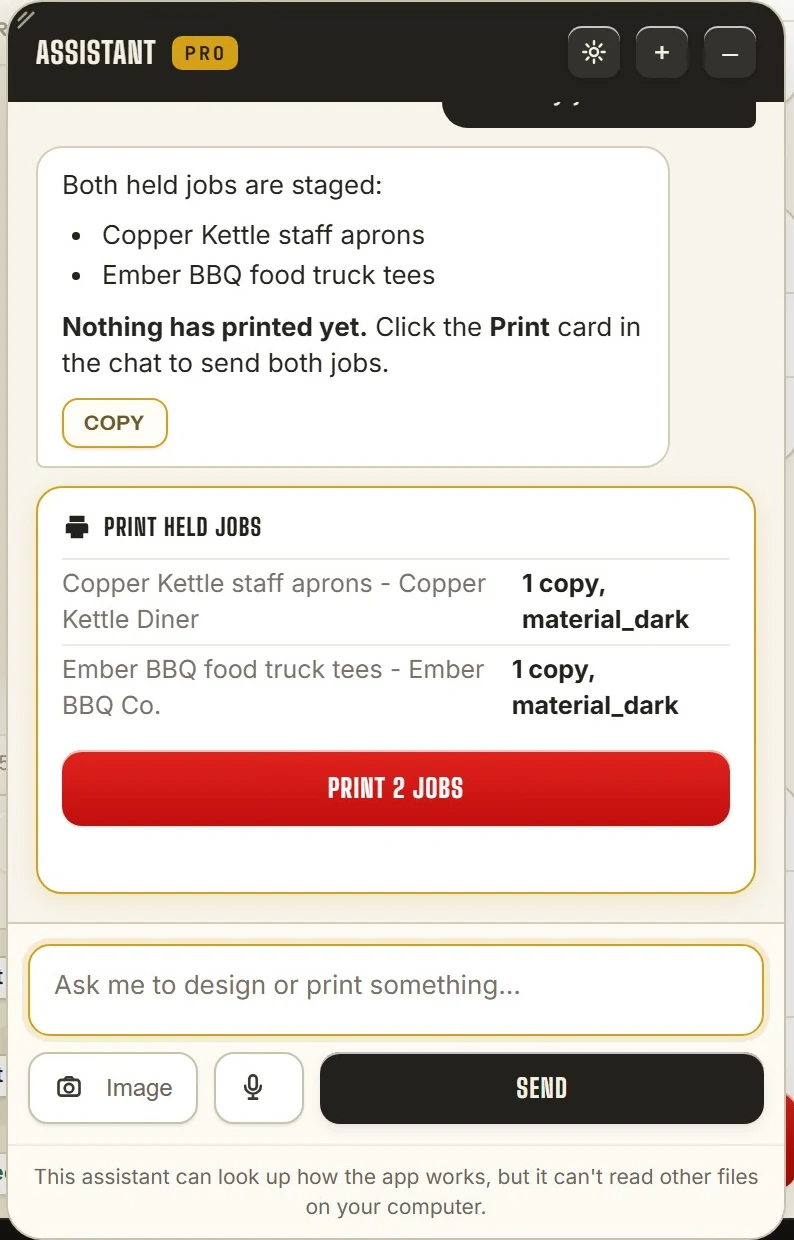
22Ask about your money, and print the held jobs
- Ask: "How much did I make today?"
- Ask it to name a job, set the customer or mark a misprint.
- Ask it to print your held jobs, then press its Print card.
It answers from the same numbers you see in the app. It never prints by itself.
A day in a DTF shop
- MorningLoad the film, and print your held gang sheets.
- All dayName each job, and click it along: Pressed, Packed, Collected.
- A transfer goes wrongRight-click, Misprint..., and say why.
- End of the dayRead the Today bar.
- End of the monthMonth report PDF, and a Statement PDF for each customer who pays later.
The Queue Manager, your prices, profit and Job history are in UPrint Design RIP and in the Studio DTF RIP. See the whole profit page, or the DTF setup guide.
Try it on your own printer
7 day free trial, no card. Every tool, on your own computer. Download Design RIP and pick DTF printer when it starts. Install it on the Windows PC that runs PrintExp, or on a Mac that saves the jobs for that PC.
Download the free trialOn day 8 the app locks until you buy. Pay with the same email and it unlocks by itself. One free trial per computer and per email.
Prices, customers and notes stay on your computer. Pictures and numbers come from an example DTF shop, not a real one. Print straight from UPrint to your DTF printer.
More guides
- DTFSet up your DTF printer and map your coloursTeach the app your printer and film width from one small print, then map the colours of the RIP you use now.
- DTFHow to print DTF transfers, step by stepFrom artwork to a pressed shirt: the steps, and what the RIP does in each one.
- DTFBuild a DTF gang sheet and fill the rollLay out a page or a roll of film, and fill the roll with one button.
- DTFMoving from Maintop: bring your DTF settings to UPrintBring the printer settings and the colour you have in Maintop, from two prints.
- DTFDTF RIP software on a Mac: what works todayWhat you do on the Mac, and what the Windows PC with PrintExp does.
- White tonerSet up the RIP for your OKI white toner printerPick your OKI model, set the white, see where it goes, fill a sheet and print.
- Print shopRun your print shop from the Queue ManagerName, price and follow every job, then see your profit, your best customers and your waste in Job history.