
Guide · UPrint Studio RIP and Design RIP · Queue Manager
Run your print shop from the Queue Manager
Name every job, print it when the paper is in, follow it to the door, and see what you made. Two parts: the Queue Manager under the canvas, and Job history behind it.
Part 1: The Queue Manager
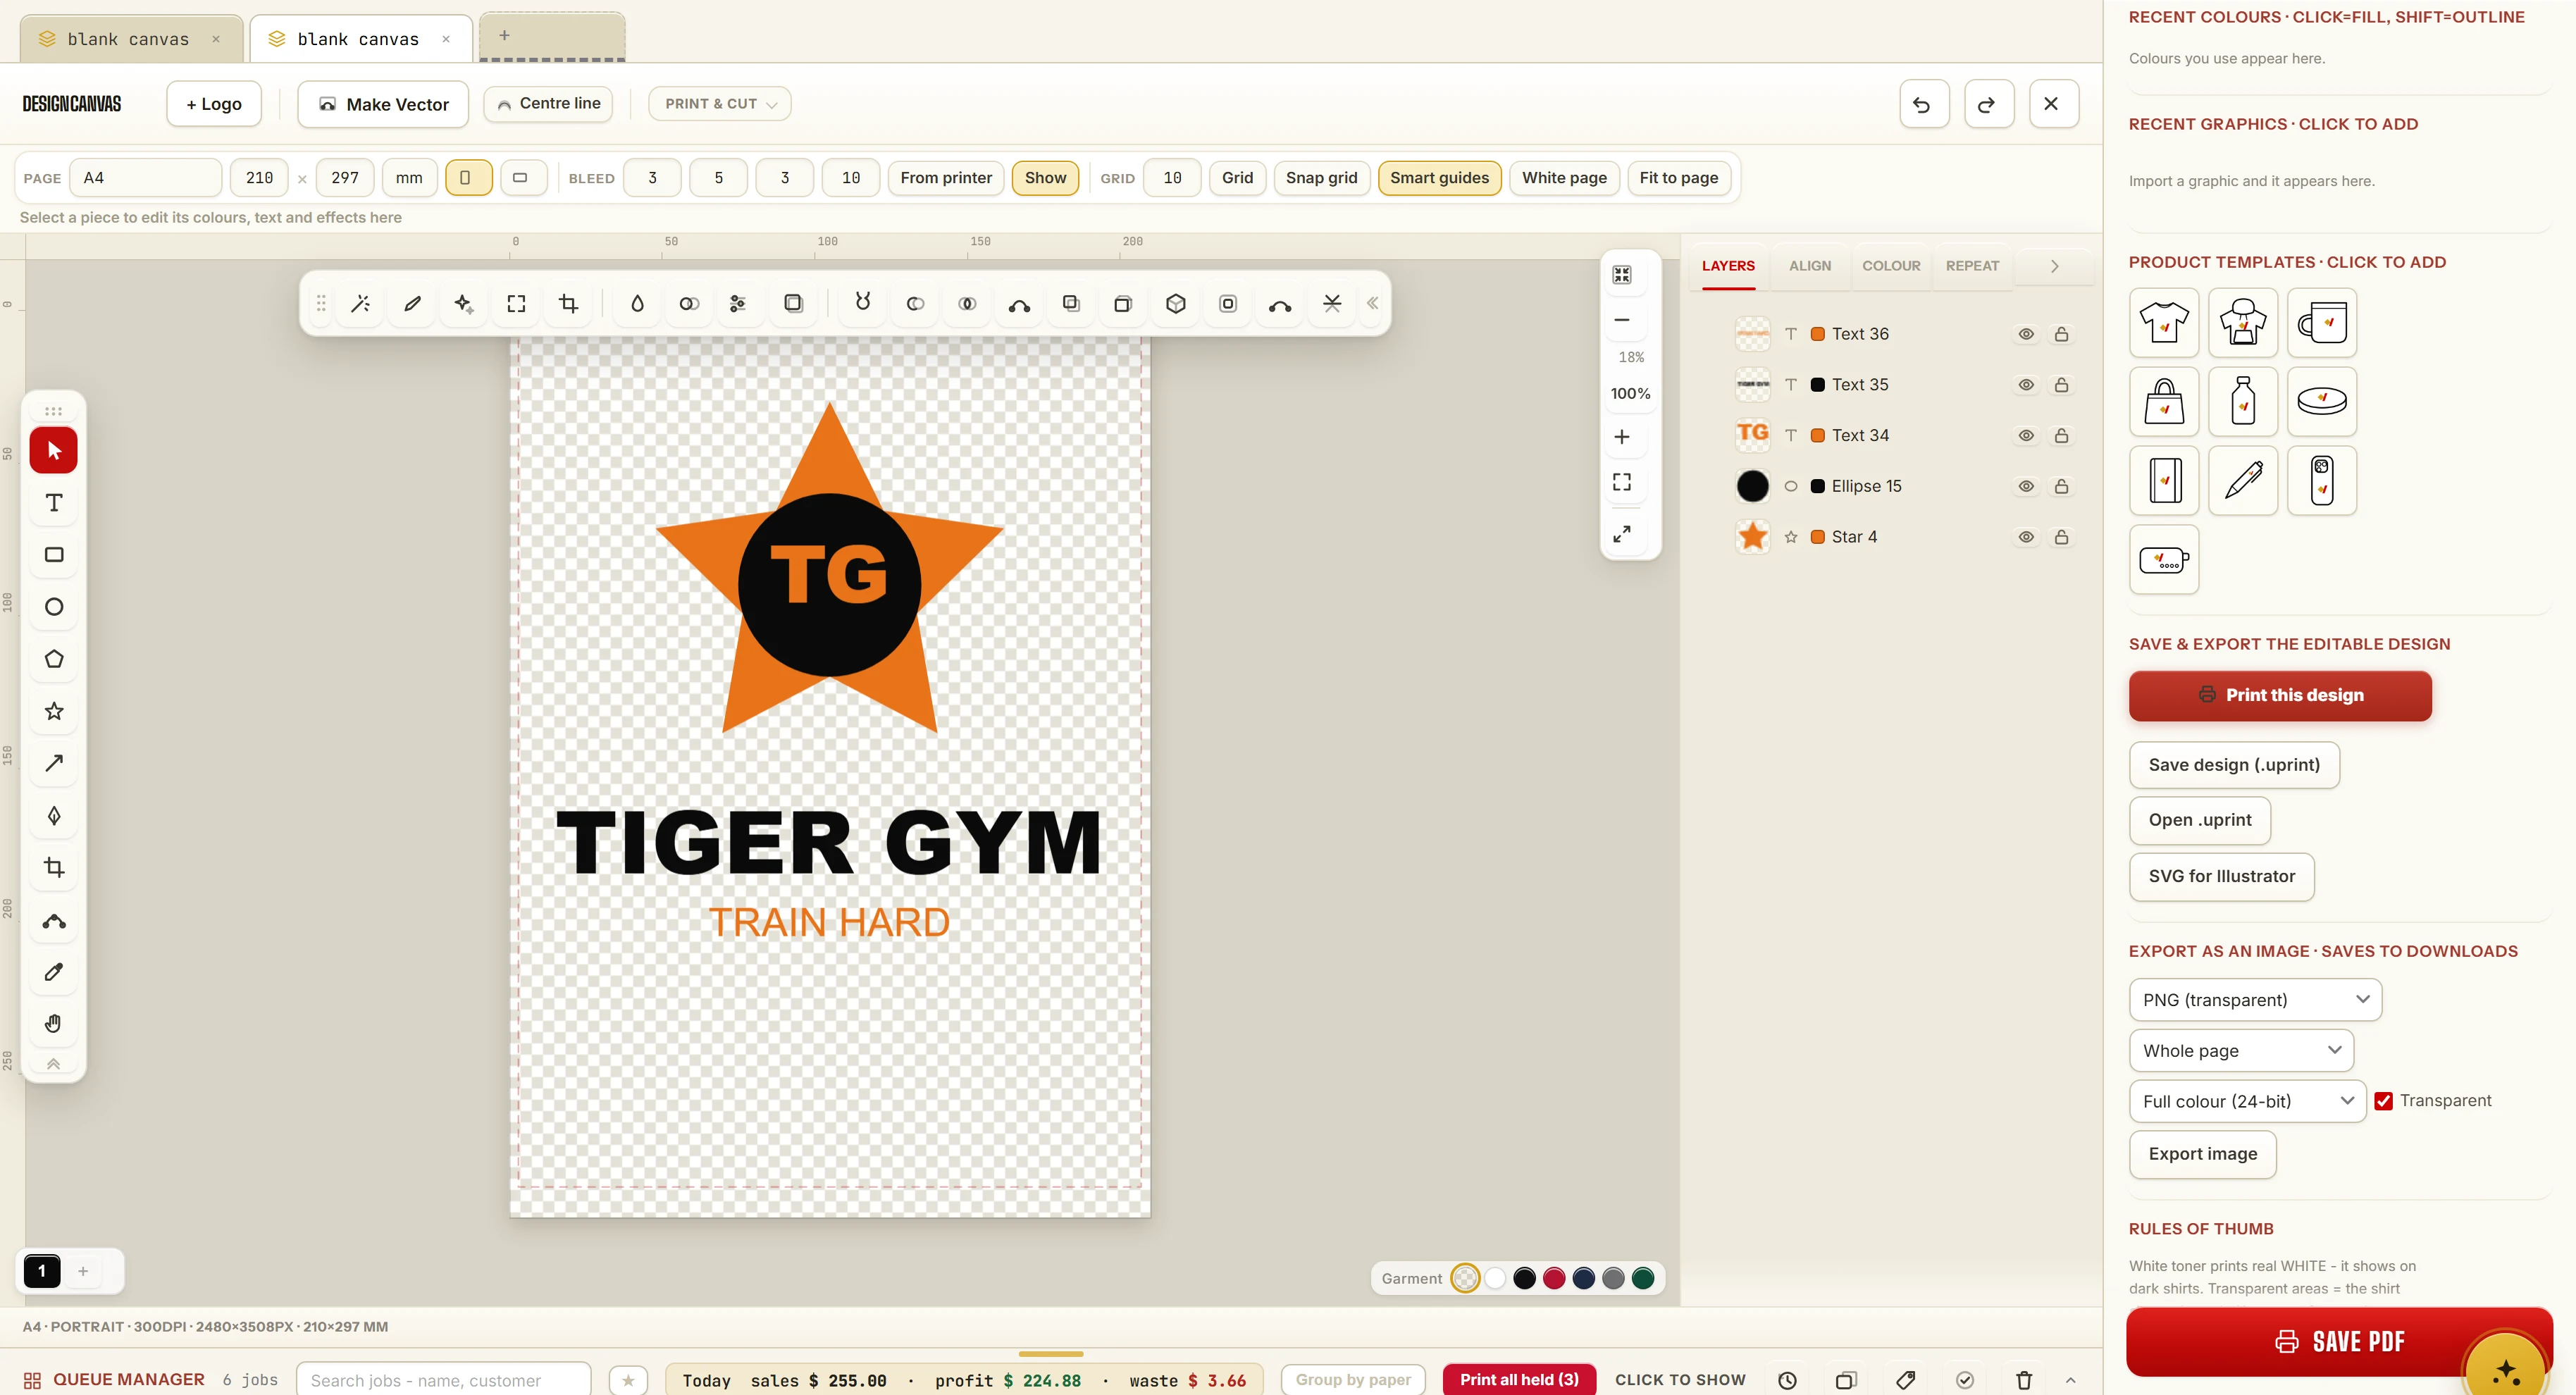
The Queue Manager is the list under the canvas. Every job you print, or save for later, is there with its picture. Drag its top edge up to see more rows. Why it matters for your profit.
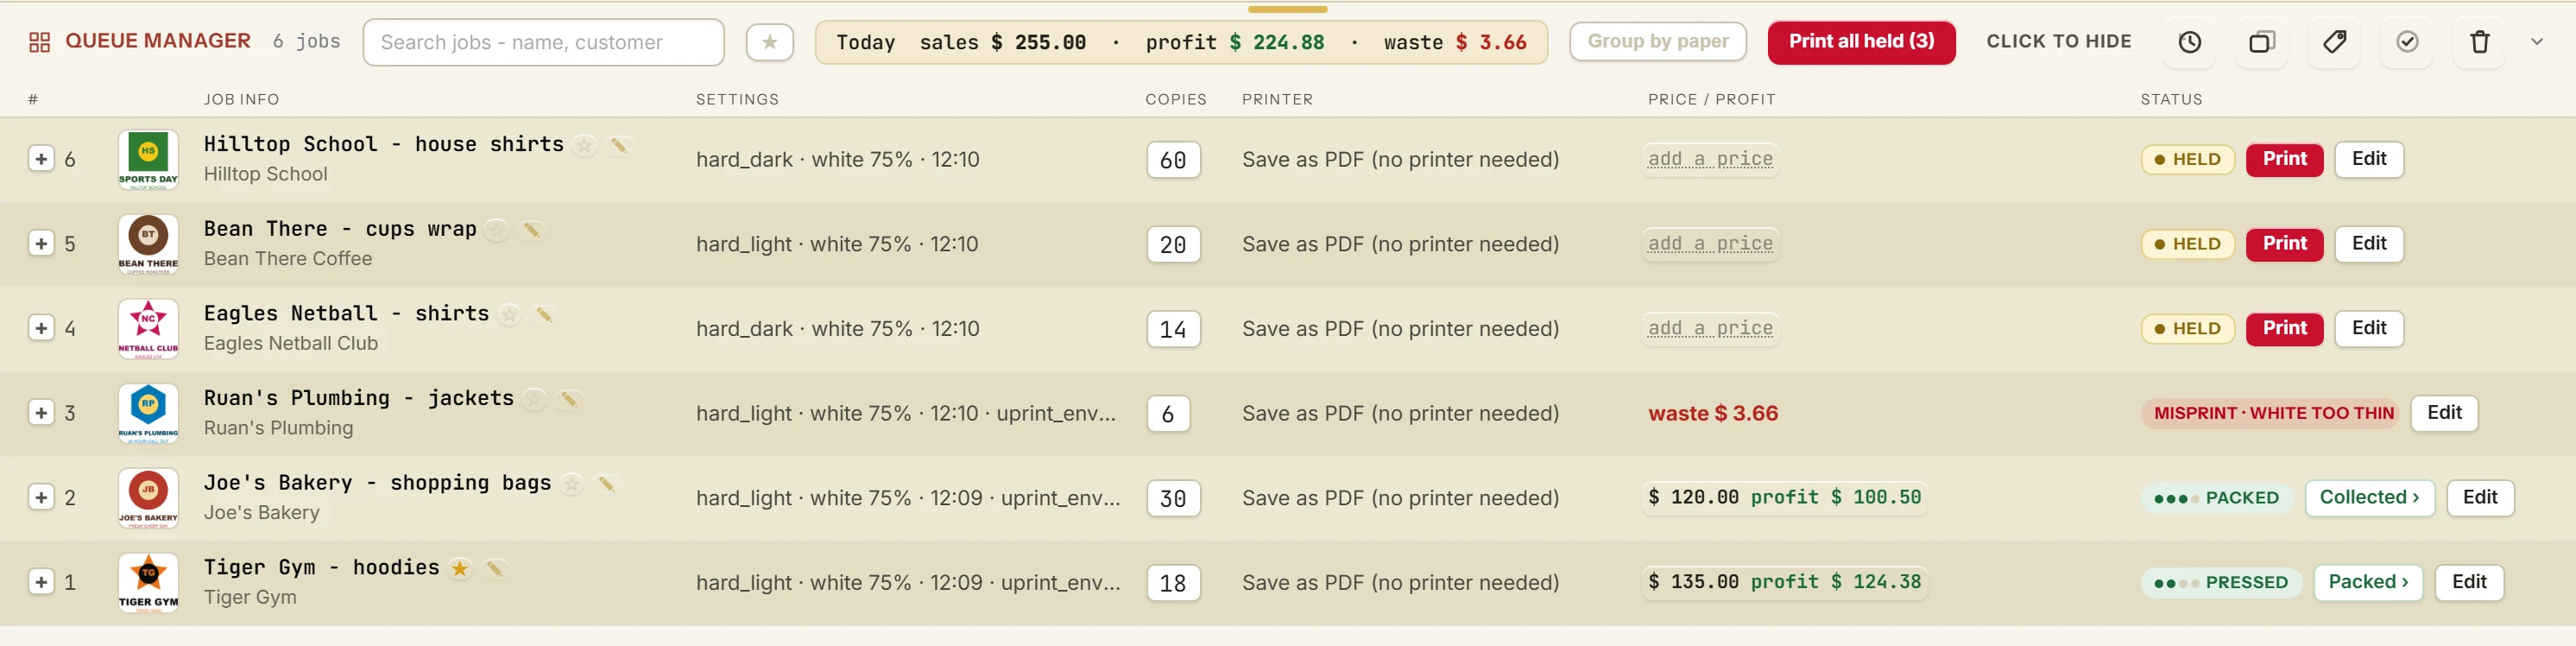
1Every job gets a name, a picture and a customer
The app names each job for you, from the file name or the biggest words on your design. A small picture shows what is on it.
- Click the pencil beside the job's name. Or right-click the job and pick Name and customer...
- Type the name and the customer.
The row shows the new name, with the customer under it.
Type the customer once. Job history keeps them, so you can find all their jobs later.
2Save a job and print it later
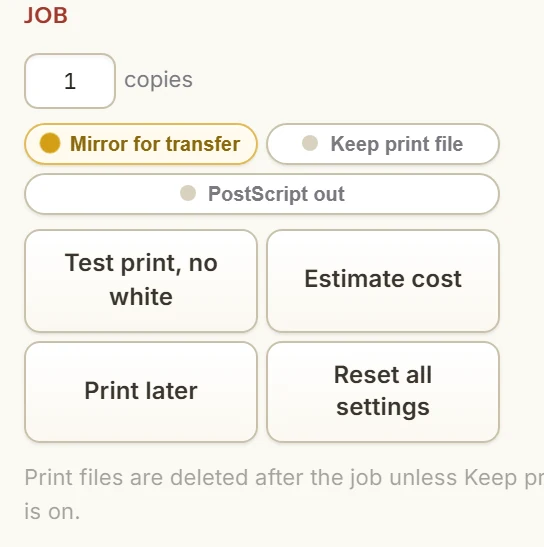
- In the Print pane, press Print later
- When the paper is in, press Print on the job.
- Or press Print all held to print every held job.
The job waits in the Queue Manager as HELD, with its design and its settings.
A held job is still there after you close the app.
3Group the held jobs by paper
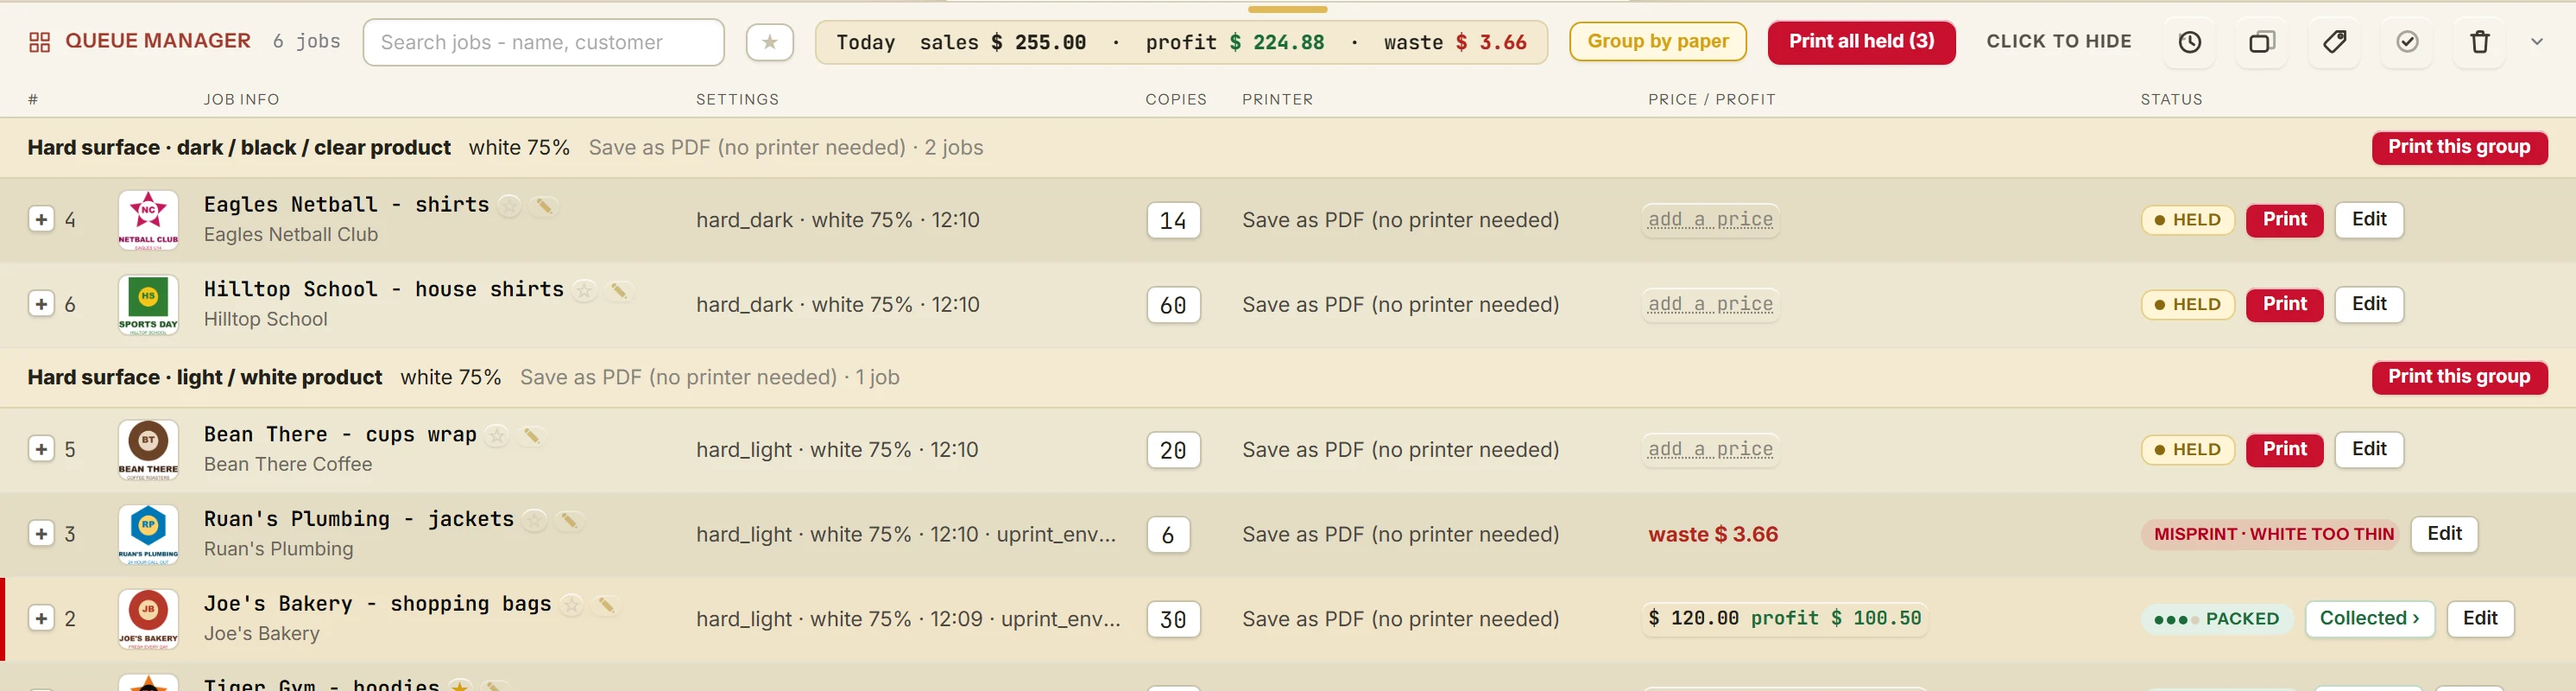
- Press Group by paper in the Queue Manager's top bar.
- Load the paper for the first group.
- Press Print this group. Only that group prints.
Jobs on the same printer, paper and white sit together under one header, oldest first.
You change the paper once per group, not once per job.
4Set your prices once
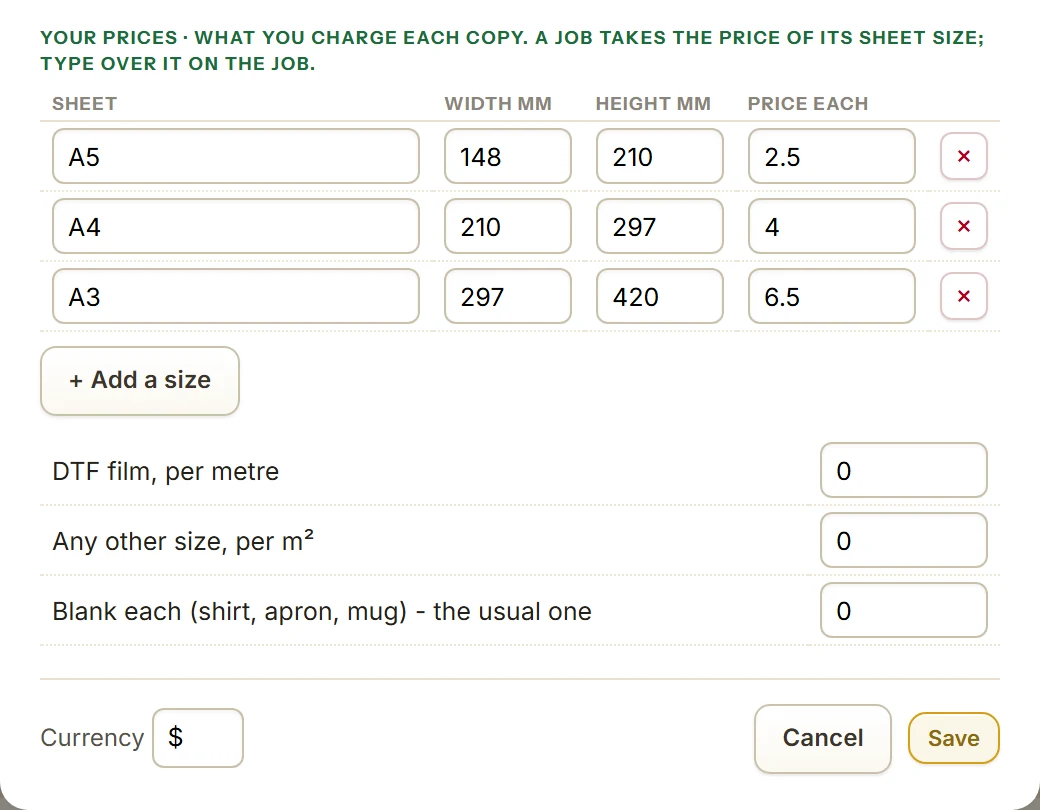
- Press the tag button in the Queue Manager's top bar.
- Under Your prices, type what you charge for one copy of each sheet size.
- Fill in DTF film per metre and the blank (shirt, apron, mug), if you use them.
- Press Save
Every job takes the price of its size, and shows its profit beside it.
One job at a different price? Click its price in the queue and type the new one.
Profit = your price, less the print, less the blank
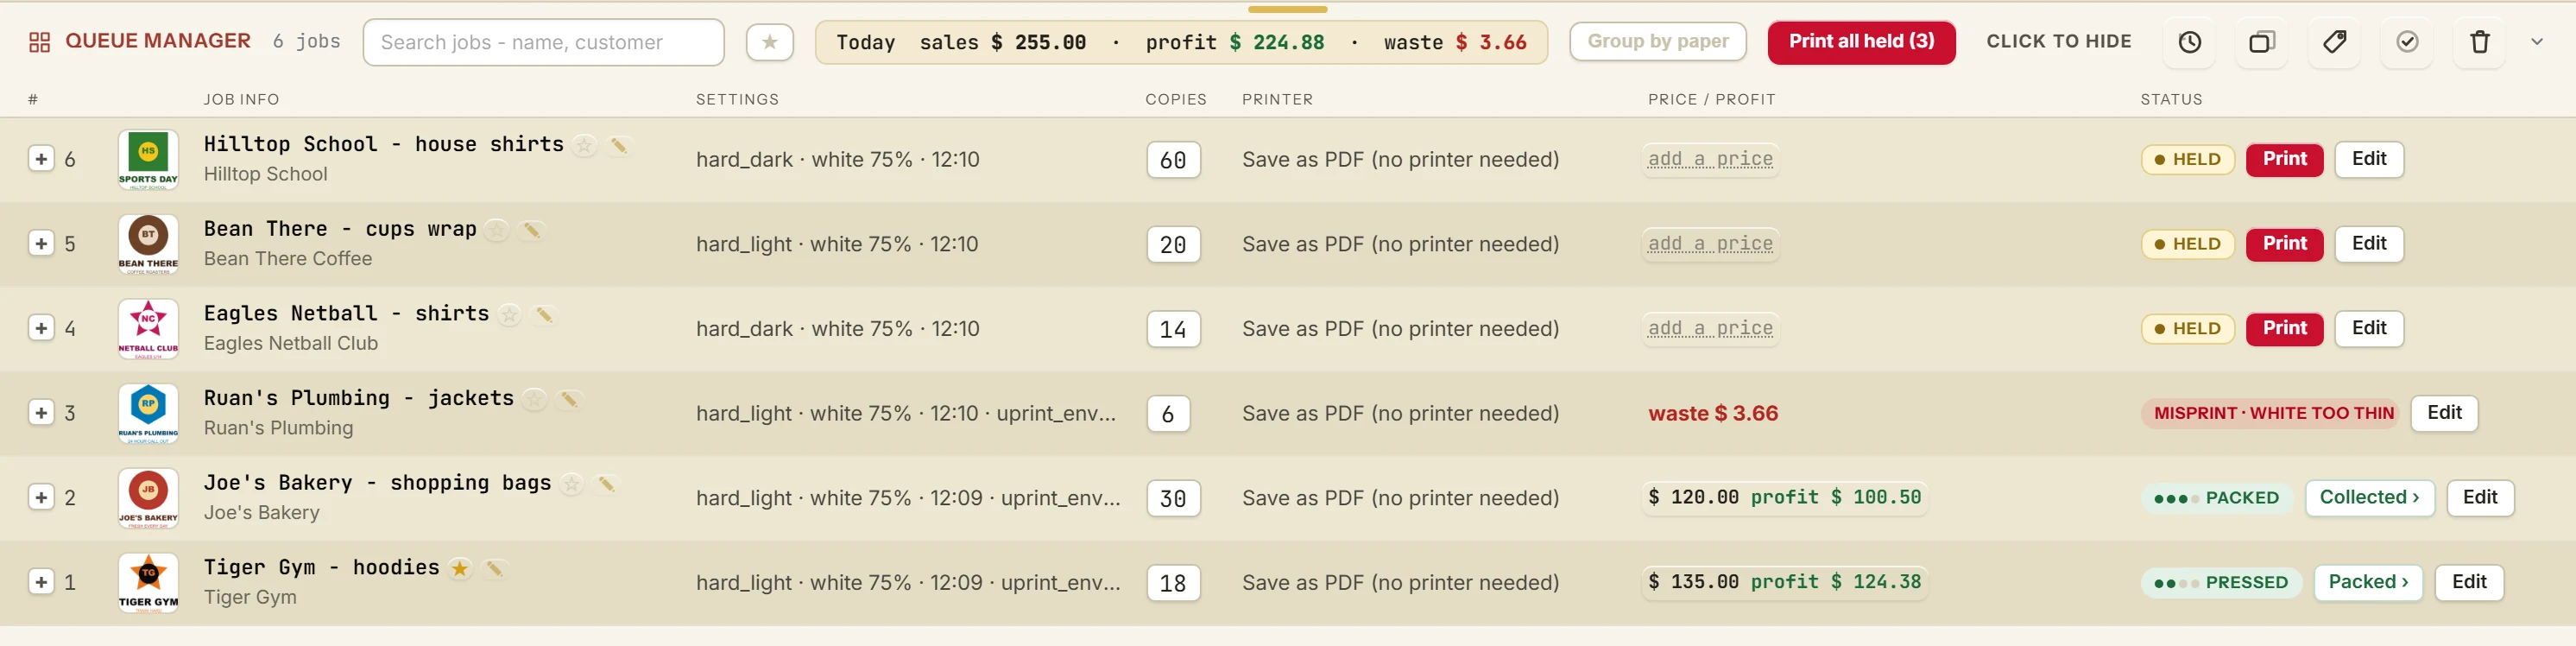
The example job in the pictures: Tiger Gym hoodies, 18 copies at $7.50 each, no blank.
5Follow each job to the door
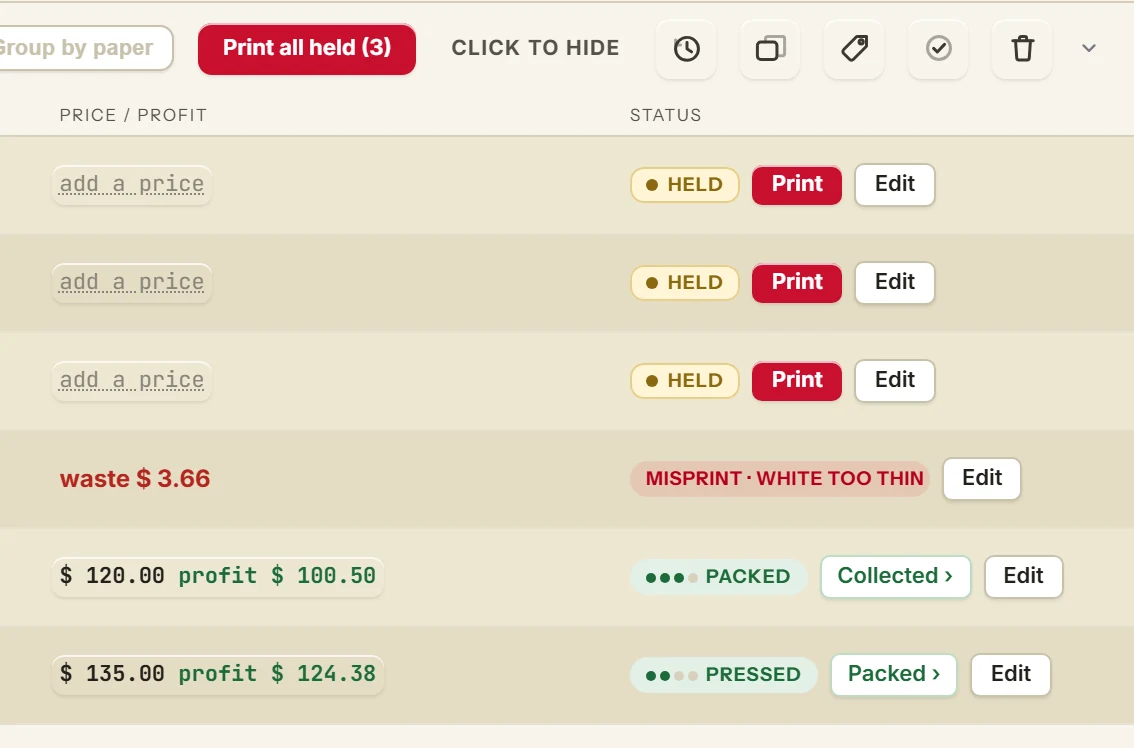
A printed job says PRINTED.
- When it comes off the press, click Pressed
- When it is packed, click Packed
- When the customer has it, click Collected
The Today bar at the top shows what today's jobs sold, what they made and what misprints cost.
Clicked too soon? Right-click the job and step back.

6Mark a misprint, and say why
- Right-click the job and pick Misprint...
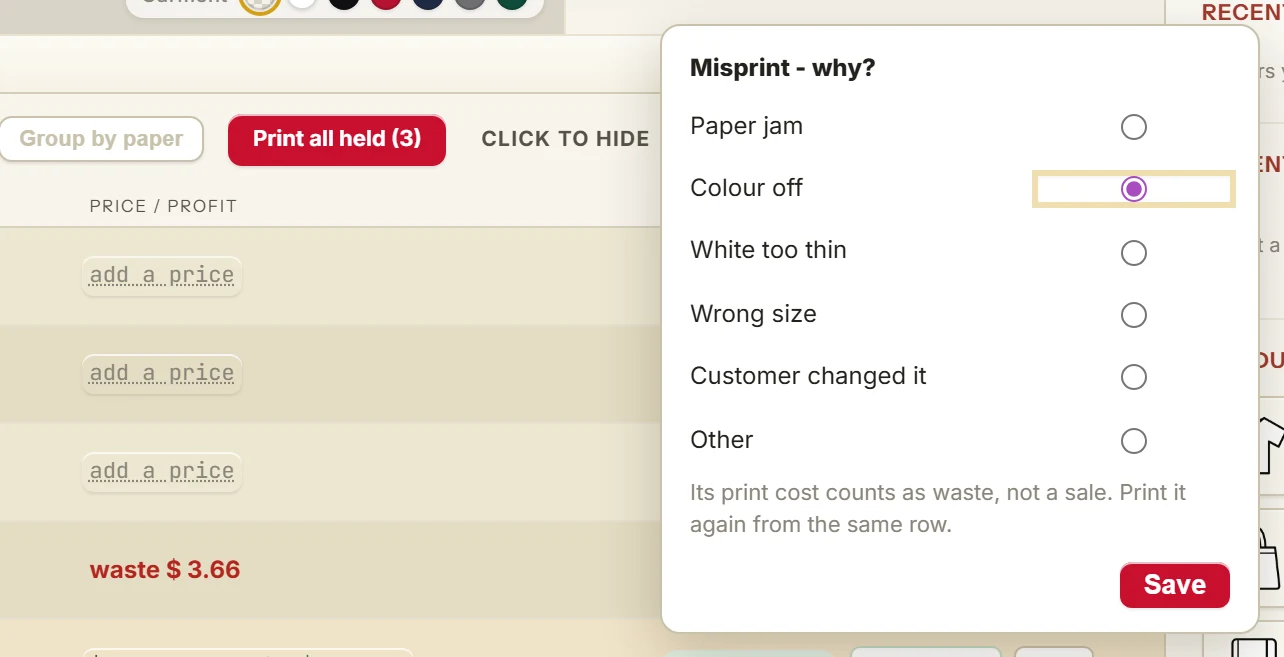
- Pick why: paper jam, colour off, white too thin, wrong size, customer changed it, or other.
- Press Save
The row says MISPRINT. Its cost counts as waste, not a sale.
Job history shows where the waste went, so you can fix the cause.
Where the waste went
The example month in the pictures: 3 misprints.
- Paper jam$11.80
- Colour off$5.36
- White too thin$3.66
7Find any job, and keep the ones that matter
- Type a job name or a customer in the search box, at the top of the Queue Manager.
- Press the star beside a job's name to keep its design for good.
- Press the star button at the top to see only starred jobs.
Only the jobs that match stay in the list.
The app keeps up to 2 GB of past designs, oldest out first. Starred and held jobs always stay.

Part 2: Job history
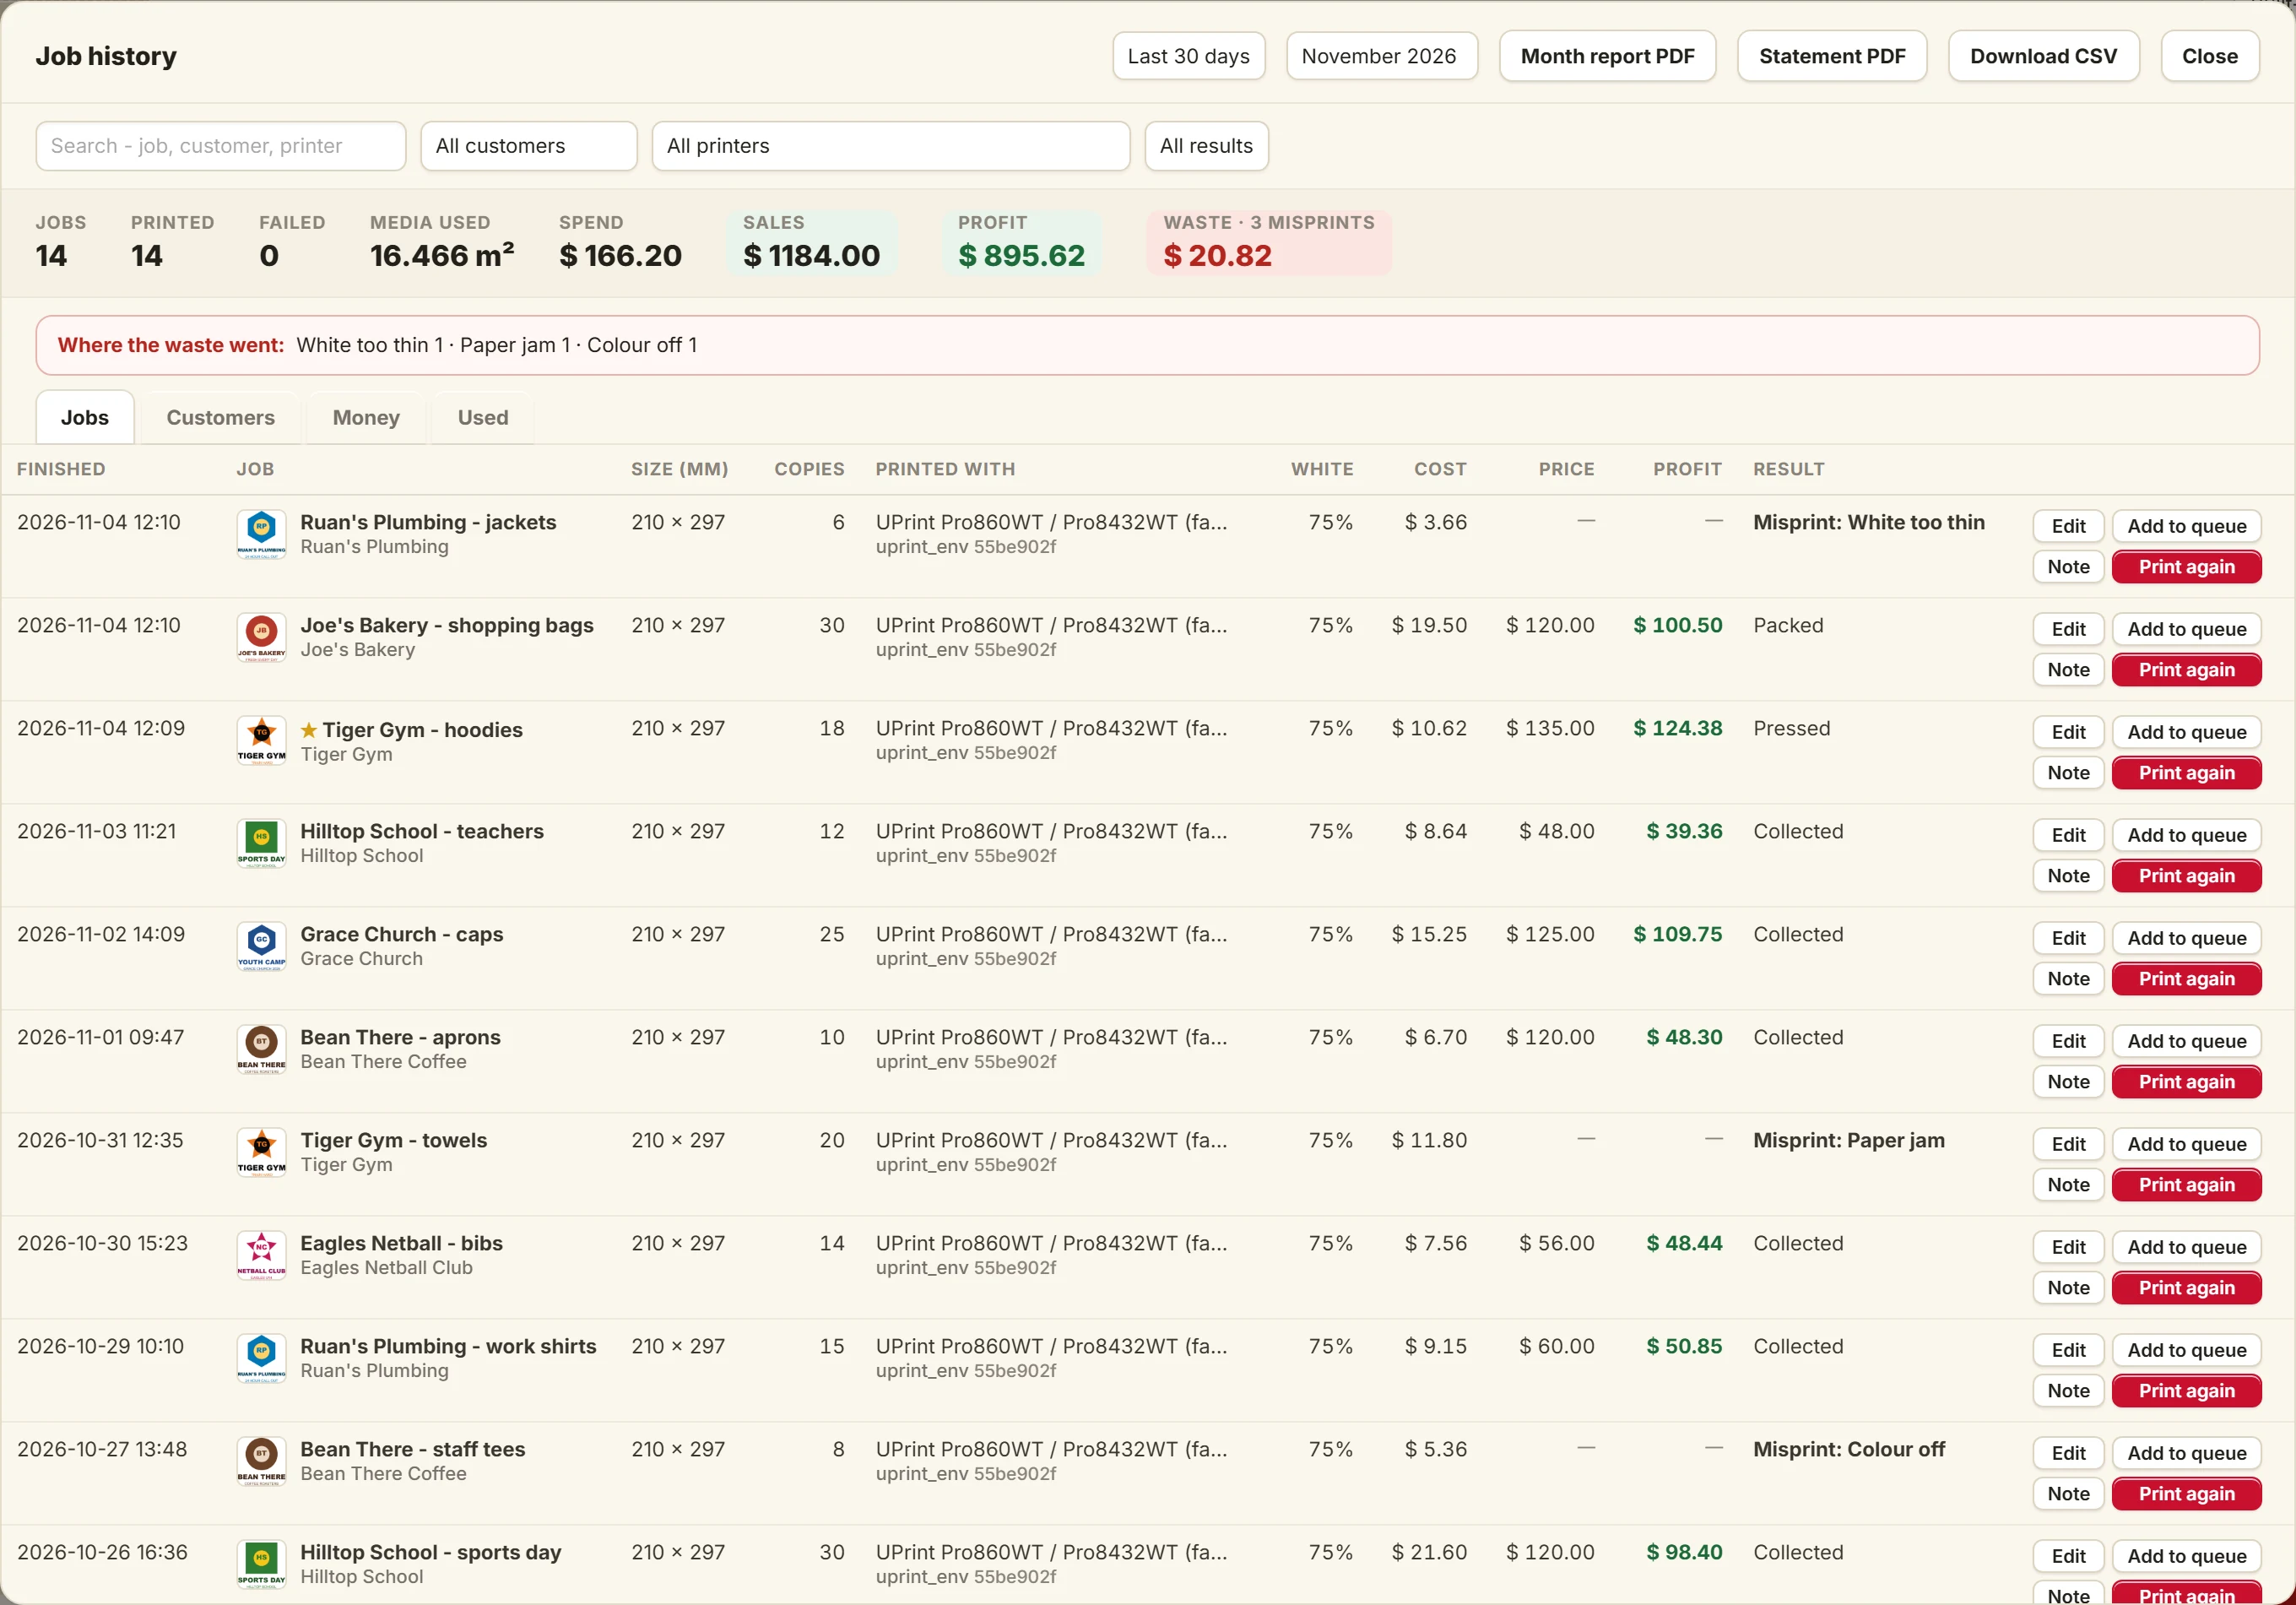
Press the clock button at the top of the Queue Manager. Every finished job is in Job history, also after the app closes, with its totals on top: jobs, media, spend, sales, profit and waste.
8Open a past job
Each job in Job history has four buttons:
- Edit puts the design back on the canvas, ready to change.
- Add to queue puts it back in the queue, held, with the settings it printed with.
- Print again prints it now, with those settings.
- Note adds a note to the job.
After Edit, the bar at the bottom says your design is reopened, every text and shape live.
9Find past jobs, and see your best customers
- Pick a customer, a printer, a result or the dates at the top. Or type in the search box.
- Press Download CSV to save the rows you see.
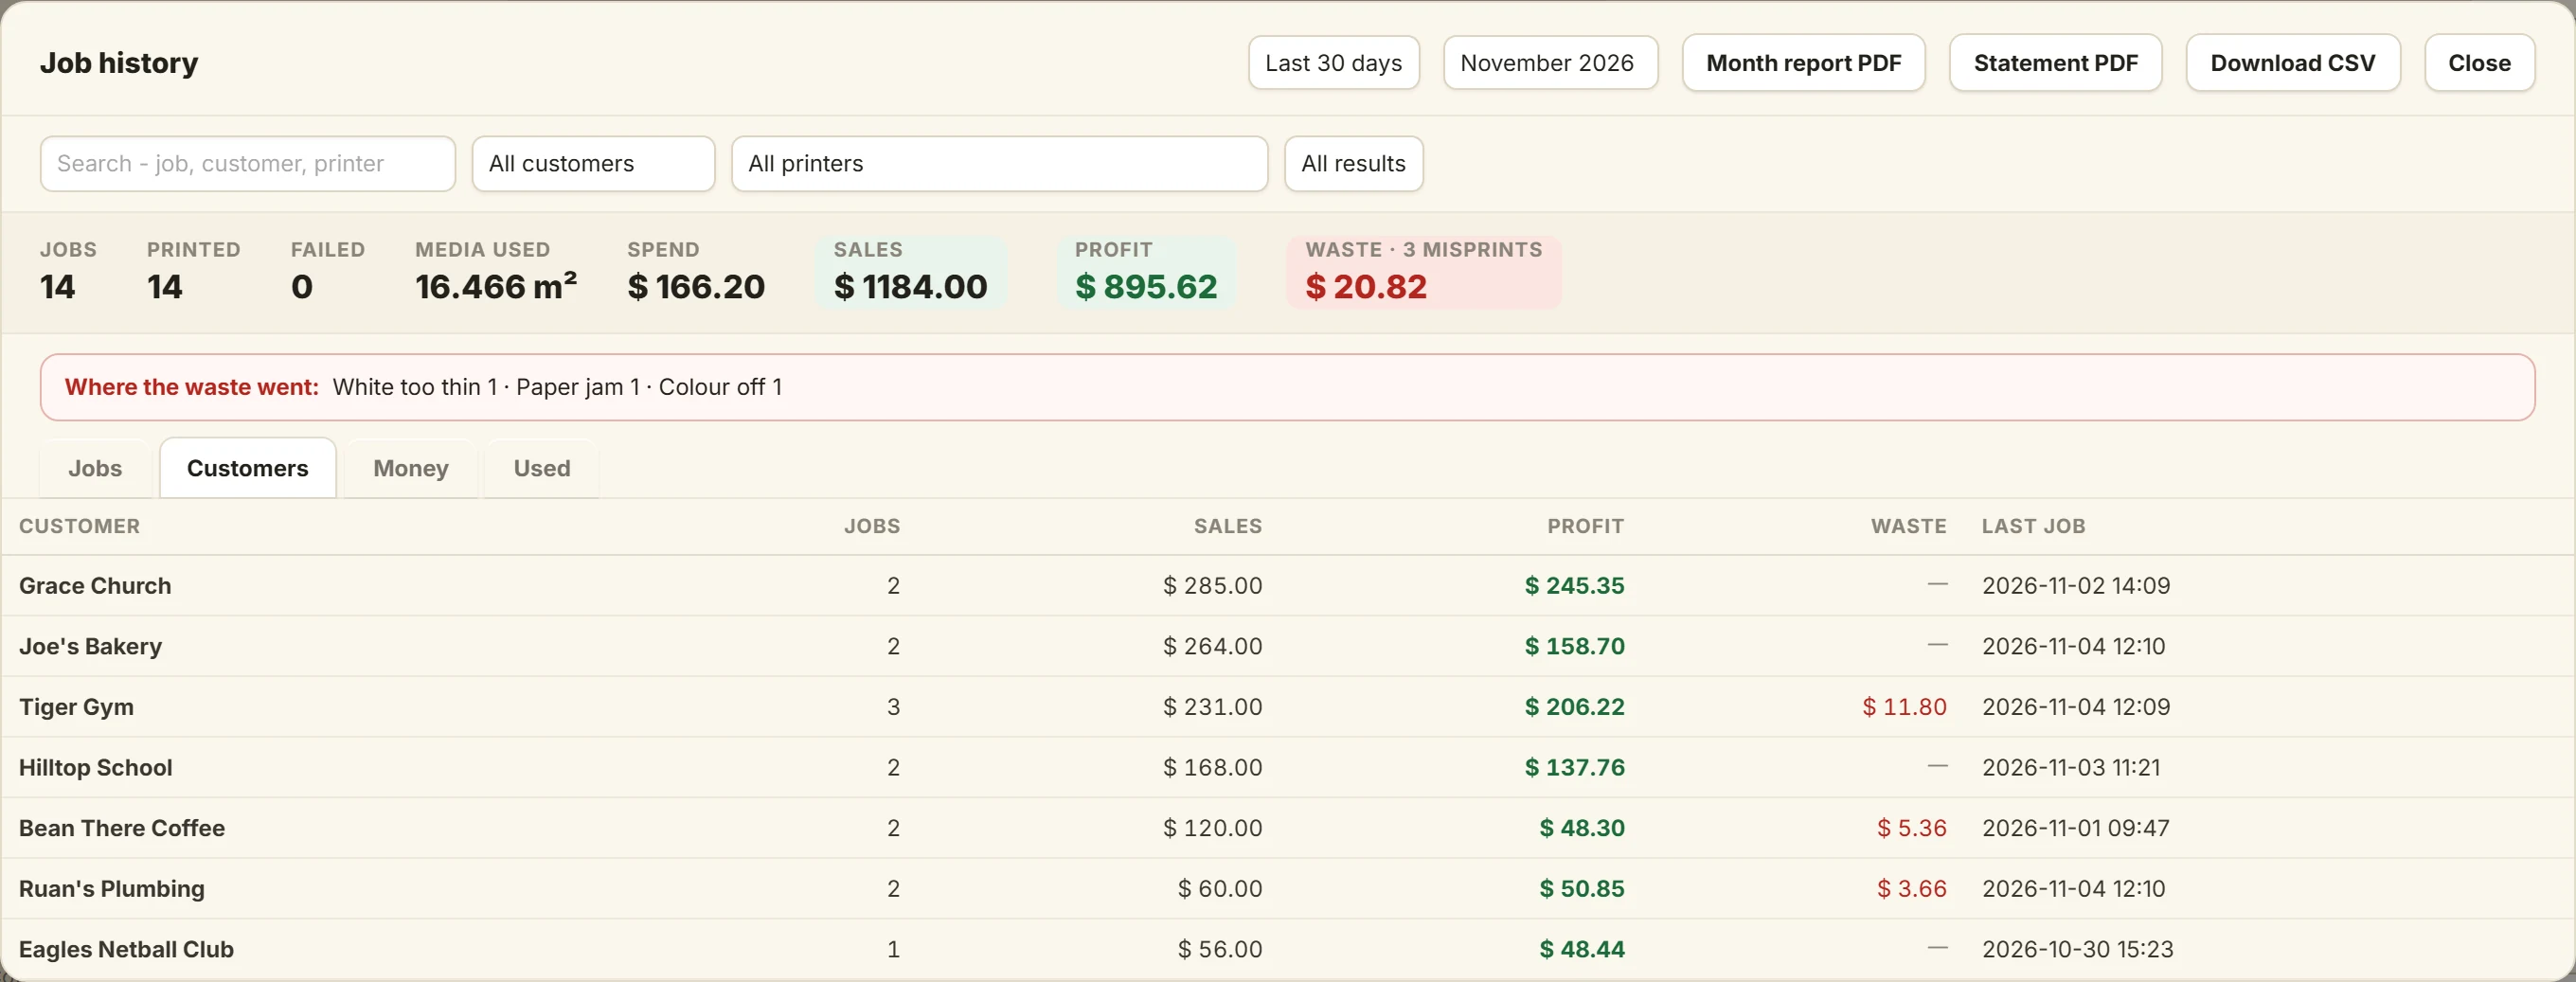
- Open the Customers tab. Click a customer to see all their jobs.
The totals at the top follow what you picked. Your best customers are listed first.
10See your money per day, week or month
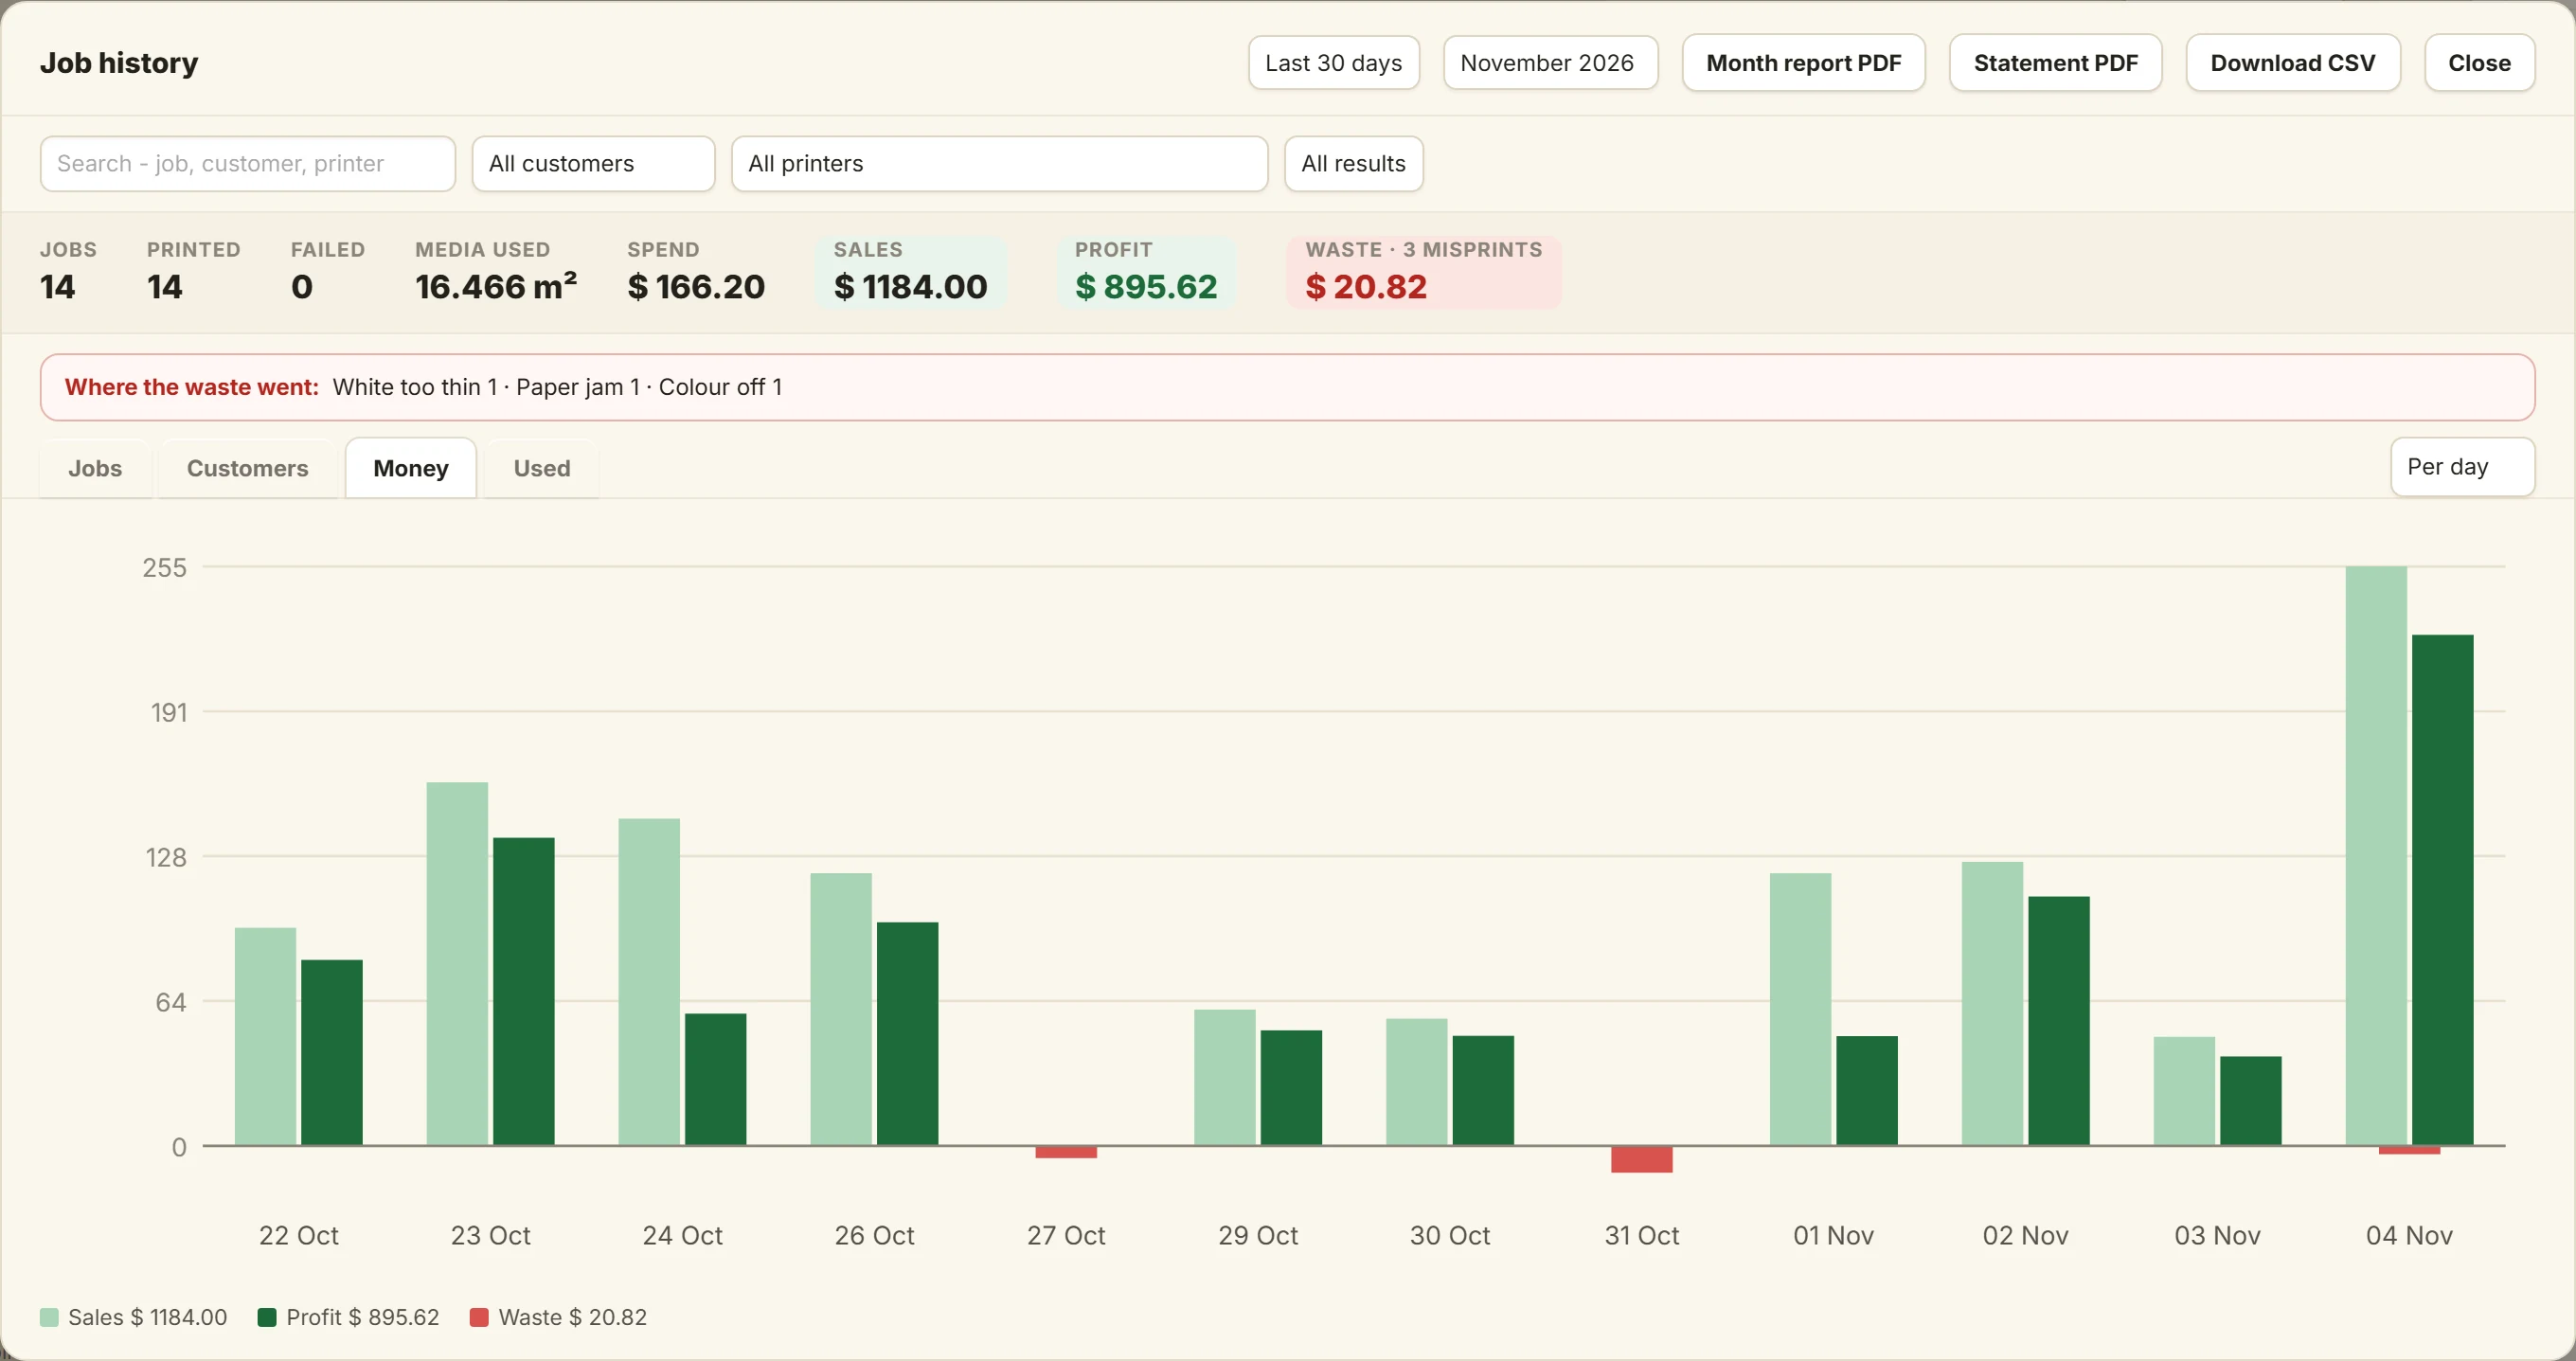
- Open the Money tab.
- Pick per day, per week or per month.
Sales and profit stand side by side for each day. Waste shows below the line.
11Know when to reorder
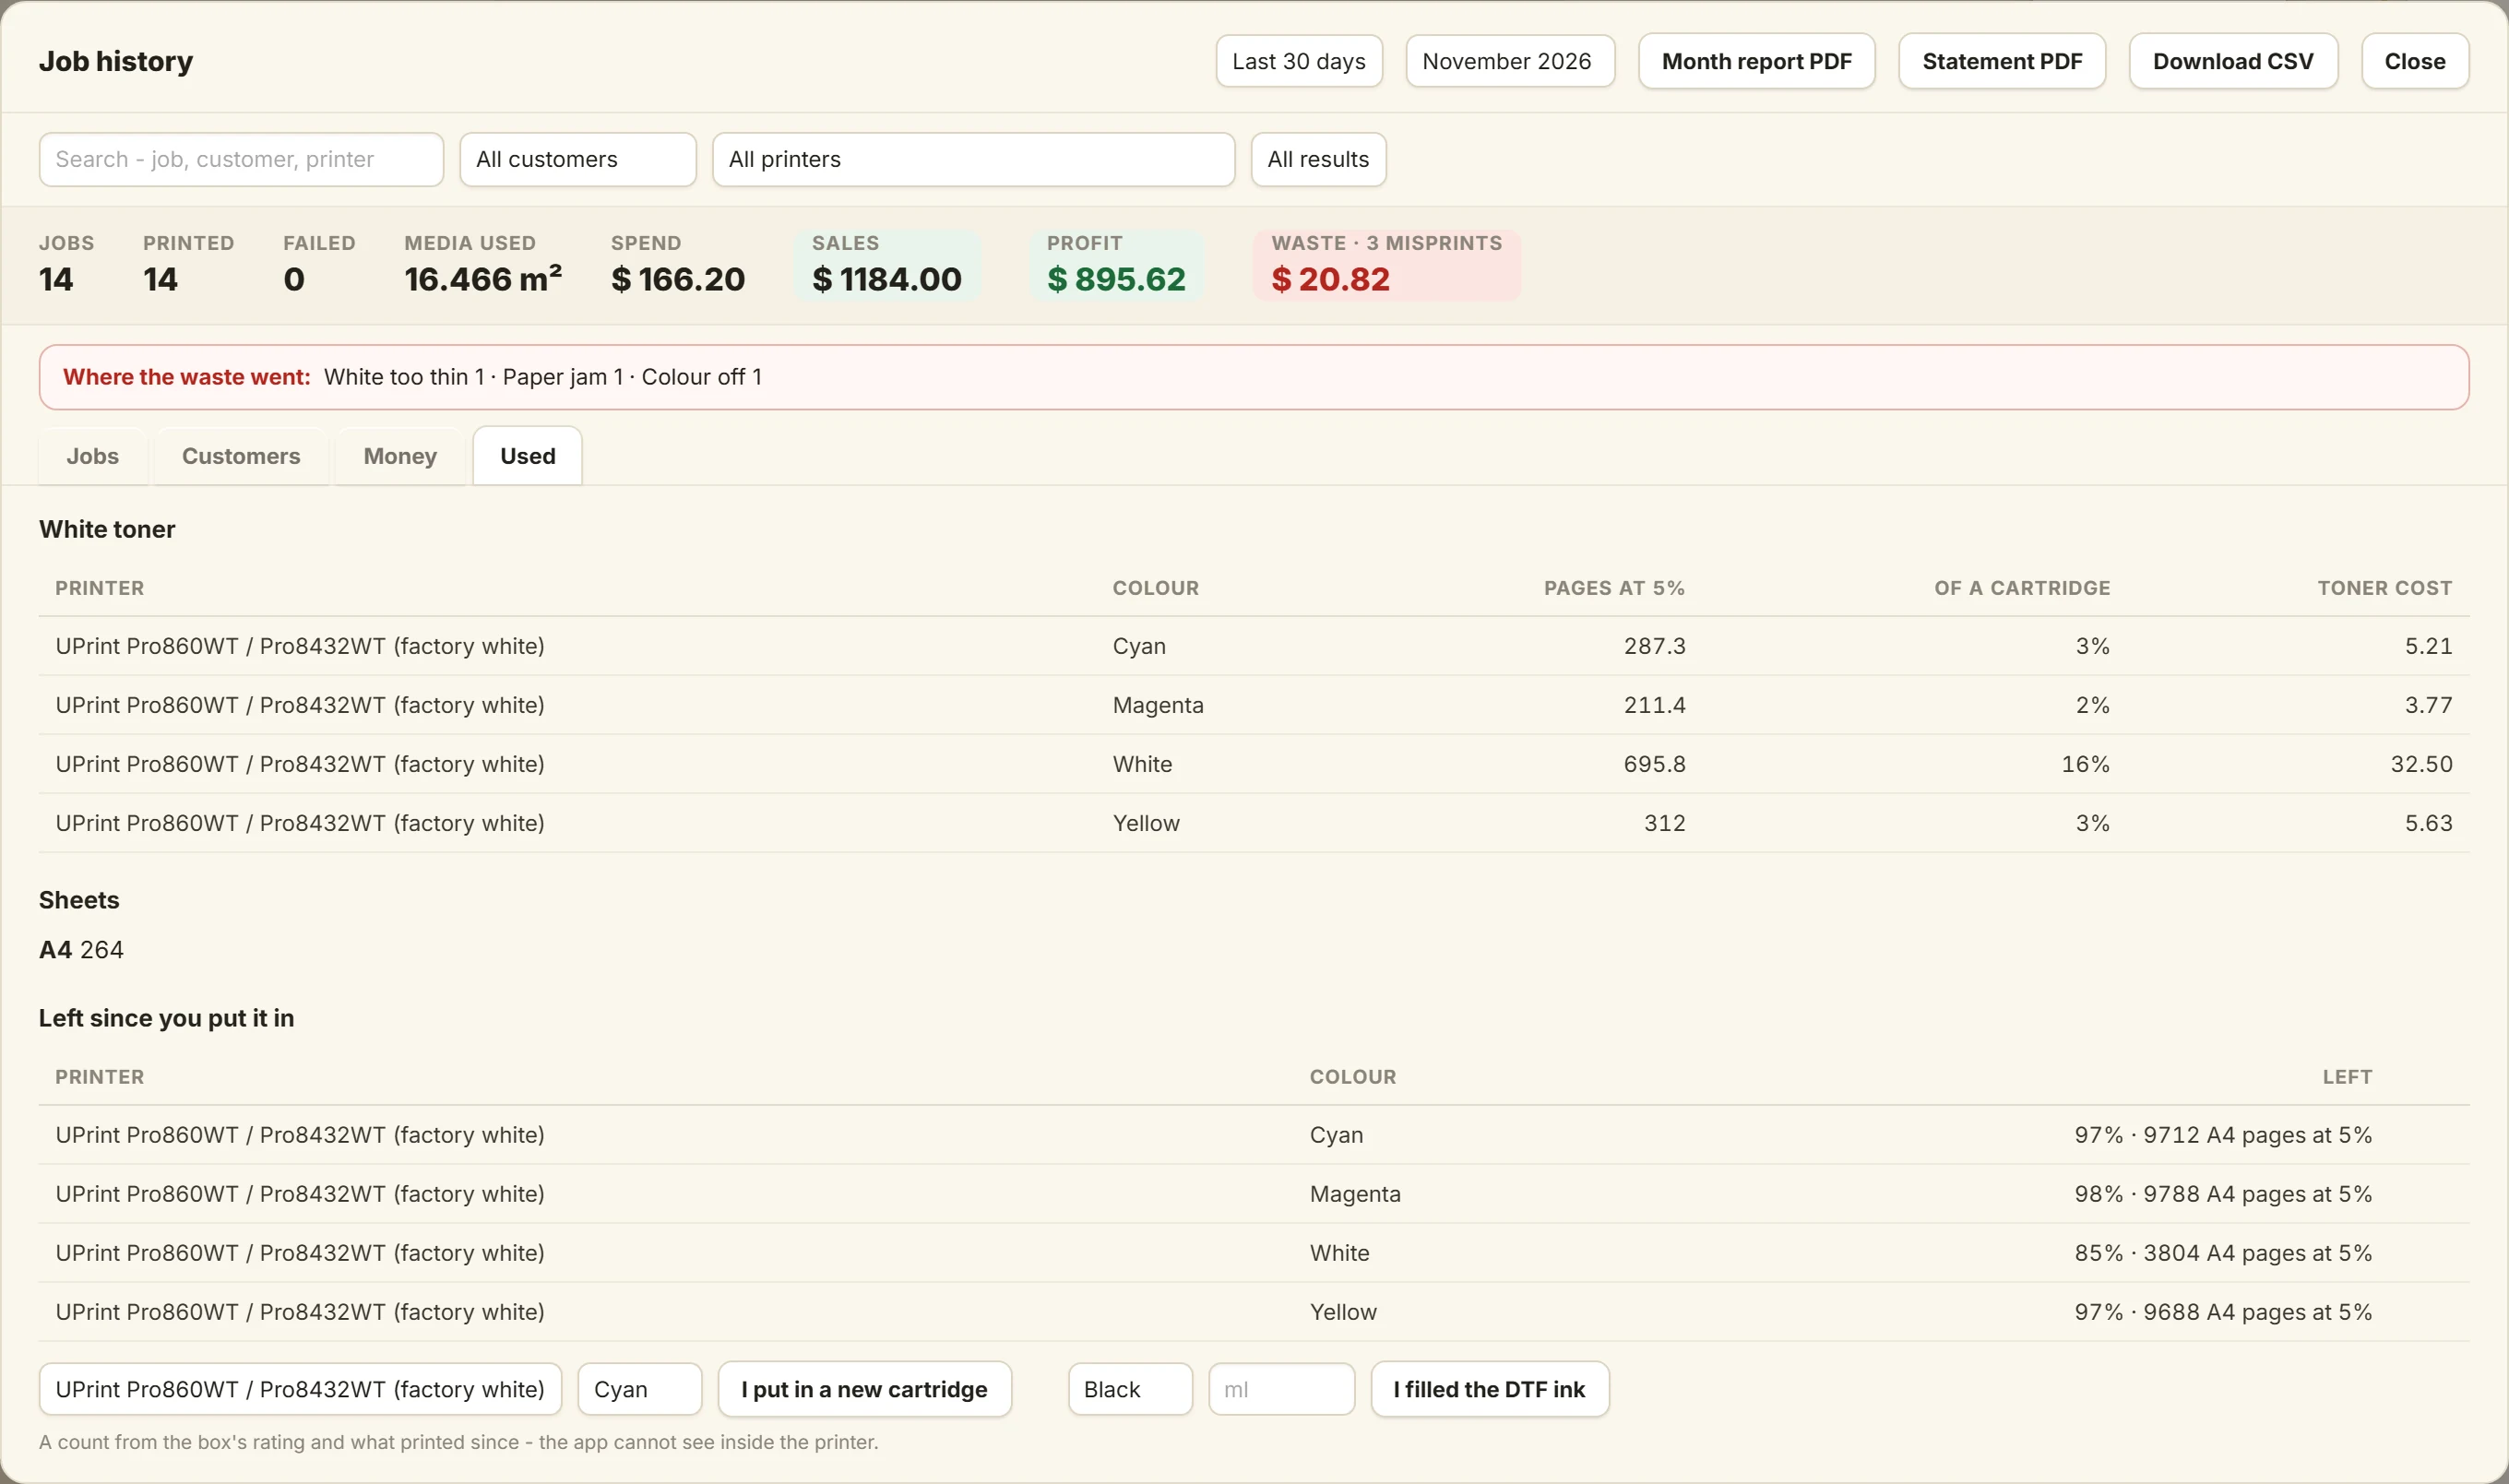
The Used tab shows the toner for each colour and the sheets for each size. On a DTF printer, ink, film and powder too.
- When you put in a new cartridge, pick the printer and the colour.
- Press I put in a new cartridge
- For a DTF ink tank, type the ml and press I filled the DTF ink
Under a fifth left, the top of the Queue Manager shows Low: and the colour.
It is a count from the box's rating and what printed since. The app cannot see inside the printer.
12Add a note to a job
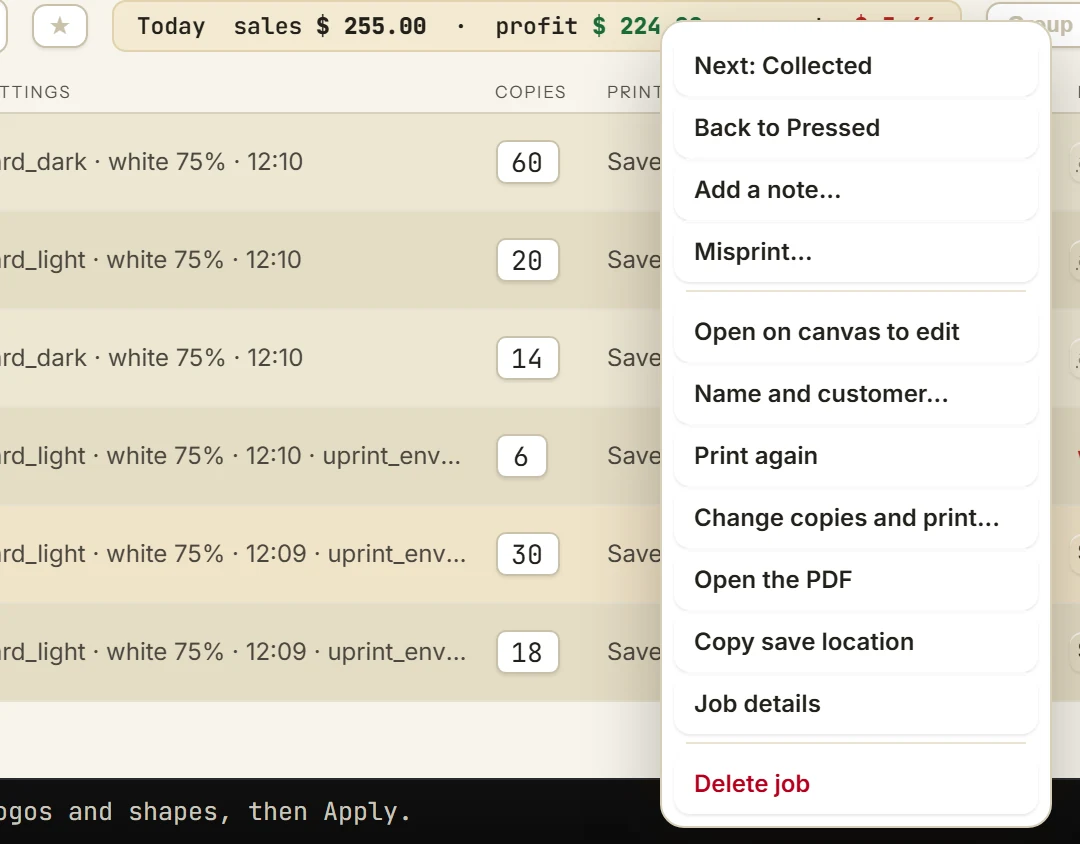
- Right-click the job and pick Add a note...
- Type the note, for example: "Customer wants it darker next time."
The note shows under the job in Job history, and the search finds it.
13Make the month report and a statement
- Pick the month, then press Month report PDF
- For a statement, pick the customer and the dates.
- Press Statement PDF
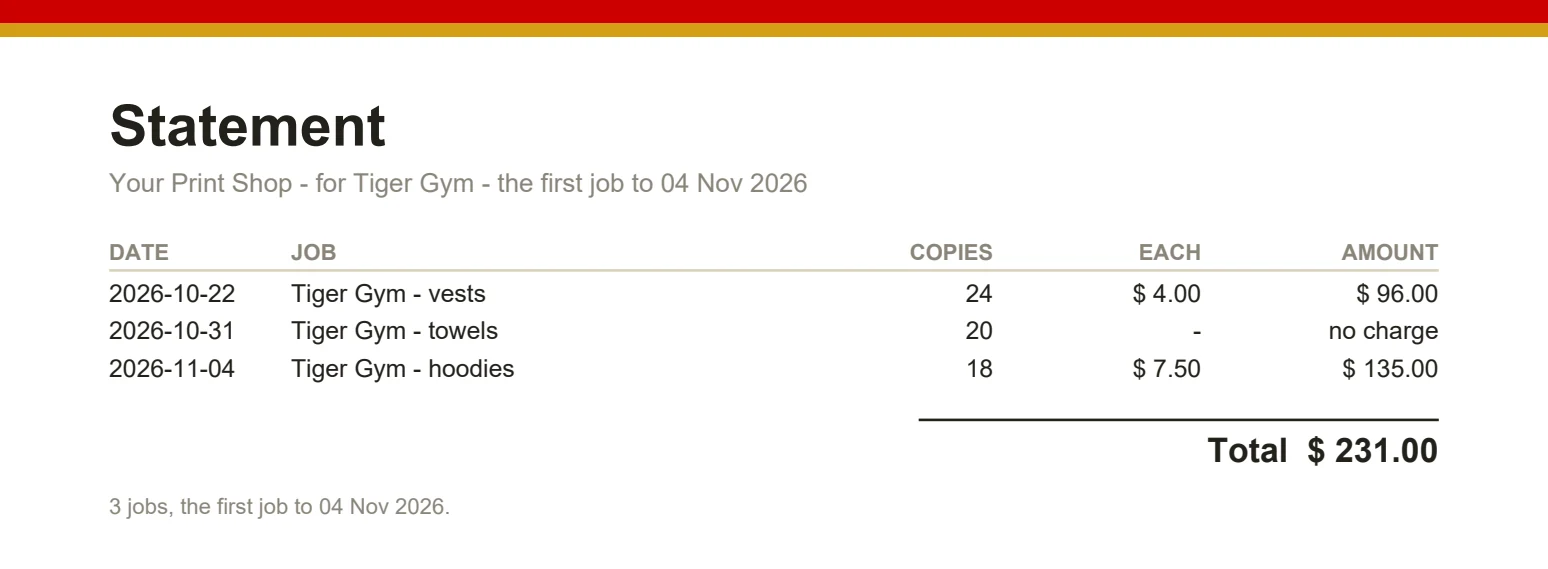
The statement lists the customer's jobs, the price of each and the total. A misprint says no charge.
A day in the shop
Five habits. Each one is a button you already have.
- MorningOpen the Queue Manager. Press Group by paper, and print each group.
- All dayPress Print later for jobs that can wait. Click Pressed, Packed, Collected as jobs move.
- A print goes wrongRight-click the job, Misprint..., and say why.
- End of the dayRead the Today bar.
- End of the monthMonth report PDF, and a Statement PDF for each customer who pays later.
Try it on your own printer
7 day free trial, no card. Every tool, on your own computer. Download Studio RIP or Design RIP. Both have the Queue Manager, your prices and Job history.
Download the free trialOn day 8 the app locks until you buy. Pay with the same email and it unlocks by itself. One free trial per computer and per email.
Names, customers, prices and notes stay on your computer. They are not sent anywhere. Pictures and numbers come from an example shop, not a real one.
More guides
- DTFSet up your DTF printer and map your coloursTeach the app your printer and film width from one small print, then map the colours of the RIP you use now.
- DTFHow to print DTF transfers, step by stepFrom artwork to a pressed shirt: the steps, and what the RIP does in each one.
- DTFBuild a DTF gang sheet and fill the rollLay out a page or a roll of film, and fill the roll with one button.
- DTFMoving from Maintop: bring your DTF settings to UPrintBring the printer settings and the colour you have in Maintop, from two prints.
- DTFDTF RIP software on a Mac: what works todayWhat you do on the Mac, and what the Windows PC with PrintExp does.
- White tonerSet up the RIP for your OKI white toner printerPick your OKI model, set the white, see where it goes, fill a sheet and print.
- DTFYour full profit and loss DTF software, step by stepSet your ink, film and powder costs once. Then every DTF job shows what it cost, what it sold for and what it made.